

MELBOURNE
CHENNAI
| Table of Contents |
|---|
Welcome to Loree Admin Dashboard
Glad! Managing Loree editor interface features via Loree Admin dashboard.
Navigation to Loree Admin Dashboard
Happy to help you to take a tour of the Loree Admin Dashboard!
For navigating into the Loree Admin Dashboard, the user should have been added to the Loree-Admin roles in the Settings → Admins. Please contact your Canvas account admin for the Admin dashboard access.
Once, the user is added to the Loree-Admin role, the user can see the Admin button in the top right corner of the Modules page of the Loree LTI in the Canvas. By clicking the Admin button, the user can manage the features of the Loree editor via the Loree Admin Dashboard. We have an organization limit on the admin dashboard. So we will be able to view only the status in the admin dashboard within the organization. This will keep the organization’s data protected.

To exit the Admin Dashboard we have to click on Exit Admin in the top right corner of the Admin Dashboard page.

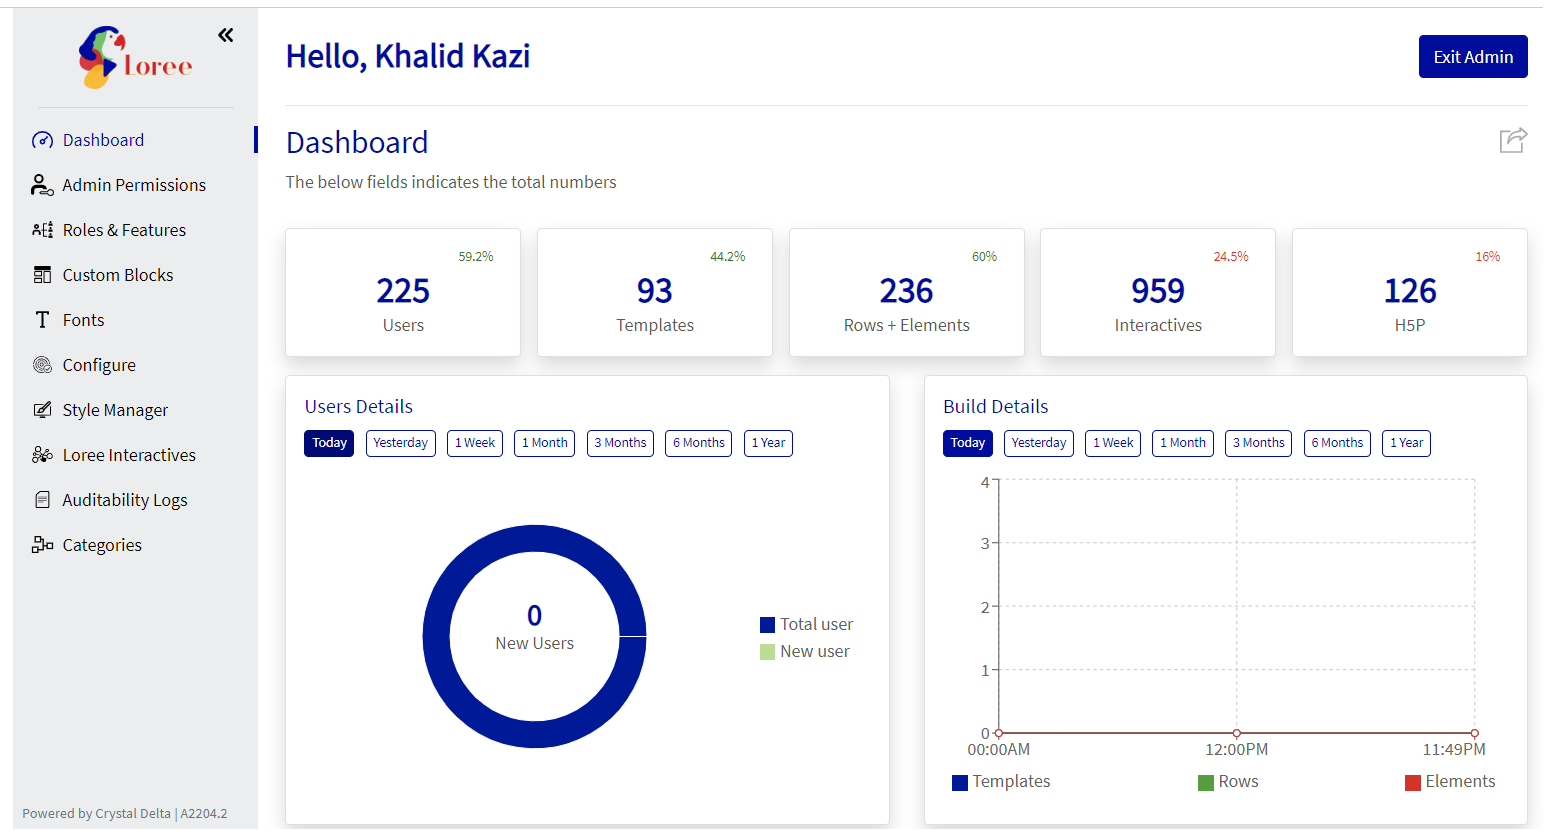
Dashboard
After switching to the Admin dashboard you will see the first option as Dashboard. When you click on Dashboard you can view the dashboard details in total numbers.
Admin Permissions
Loree Design Admin
In Current Loree - we have newly implemented the multi-tier Admin access and introduced new Admin role management for Loree-Design-Admin who can also have access to get Admin Dashboard. If the LMS admin assigns a user as Loree-Design-Admin they will get the admin dashboard option, But in the admin dashboard, Loree-Design-Admin will only get the options that are enabled by the LMS admin. When the user is removed from the Loree-design-admin role by the LMS admin they can still launch Loree, but they will not get the Admin button.
In the Admin Dashboard, the LMS admin can find a new feature Admin Permissions. This admin permissions option will enable the admin dashboard permissions for the Loree-design-admin. This feature list will have all the features similar to the LMS admin dashboard but will not have the Admin Permissions option.

Dashboard Section:
When LMS admin clicks on the drop-down option of the Dashboard Section they will find the Read and filter option to be enabled or disabled for Loree-design-admin. If this feature is enabled Loree-design-admin will be able to view the dashboard reports.

Roles and Permissions:
When LMS admin clicks on the drop-down option of Roles and Permissions, They will find multiple options such as Read-only, Create Loree role, Fetch Canvas Roles from Accounts, and Mapping Loree roles with Canvas roles.

Read Only, This option will allow Loree-design-admin to view the roles and features enabled by the LMS admin.
Create Loree role, This option will allow Loree-design-admin to create a new Loree role.
Fetch Canvas Roles from Accounts, This option will allow Loree-design-admin to fetch the Canvas roles from accounts and sub-accounts.
Mapping Loree roles with Canvas roles, This option will allow Loree-design-admin to Map Loree roles with Canvas roles.
Custom Blocks:
When the LMS admin clicks on the drop-down option of Custom Blocks, They will find the read-only option and the Edit Blocks option.

Read Only, This option will allow Loree-design-admin to view the Custom Blocks that are already created.
Edit Blocks, This option will allow Loree-design-admin to edit Templates/Rows/Elements.
Fonts:
When the LMS admin clicks on the drop-down option of Fonts, They will find the read-only option and the Enable/ disable fonts option.

Read Only, This option will allow Loree-design-admin to view the Fonts that are already enabled.
Enable/ disable fonts, This option will allow Loree-design-admin to Enable and disable fonts from the list that is already updated in the font list.
Configure:
When LMS admin clicks on the drop-down option of Configure, They will get multiple configuration options such as Canvas User Credentials(Read Only), External Tools (Read only), External Tools (Can Edit), Kaltura (Read Only), and Kaltura (Can Edit).

Canvas User Credentials(Read Only), This option will allow Loree-design-admin to view the Canvas credentials which cannot be edited.
External Tools (Read only), This option will allow Loree-design-admin to view the External Tools configuration.
External Tools (Can Edit), This option will allow Loree-design-admin to View and Edit the external tools configurations.
Kaltura (Read Only), This option will allow Loree-design-admin to View the Kaltura configuration if they have any.
Kaltura (Can Edit), This option will allow Loree-design-admin to View and edit the Kaltura configuration.
Style Manager:
When LMS admin clicks on the drop-down option of Style Manager, They will get multiple options such as Custom Colors, Custom Headers, and Custom Links.

Custom Colors, This option will allow Loree-design-admin to add and edit custom colors.
Custom Headers, This option will allow Loree-design-admin to add and edit custom Headers options.
Custom Links, This option will allow Loree-design-admin to add and edit custom links options.
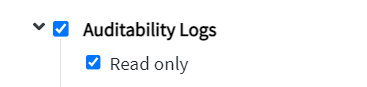
Auditablility Logs:
When LMS admin clicks on the drop-down option of Auditibility Logs they will read only option there if they enable it Loree-design-admin will be able to view the Auditability Logs.
Categories:
When LMS admin clicks on the drop-down option of Categories, They will get multiple options such as Read-only, Create New Category, Rename, and Delete Categories.

Read Only, This option will allow Loree-design-admin to view the categories that are already created.
Create New Category, This option will allow Loree-design-admin to Create a new category.
Rename, This option will allow Loree-design-admin to rename a category name.
Delete Categories, This option will allow Loree-design-admin to delete an existing category.
Loree Interactive Management (Individual/ Bulk)
When LMS admin clicks on the drop-down option of Loree Interactive Management (Individual/ Bulk), They will get multiple options such as Read-only, Rename, Share as Global, Share to Sub-Accounts, and Delete.

Read Only, This option will allow Loree-design-admin to view the interactives that are already created.
Rename, This option will allow Loree-design-admin to rename an interactive.
Share as Global, This option will allow Loree-design-admin to Share an existing Interactive Globally among all the users in the instructure.
Share to Sub-Accounts, This option will allow Loree-design-admin to share the interactives among particular sub-accounts.
Delete, This option will allow Loree-design-admin to delete an existing interactive.
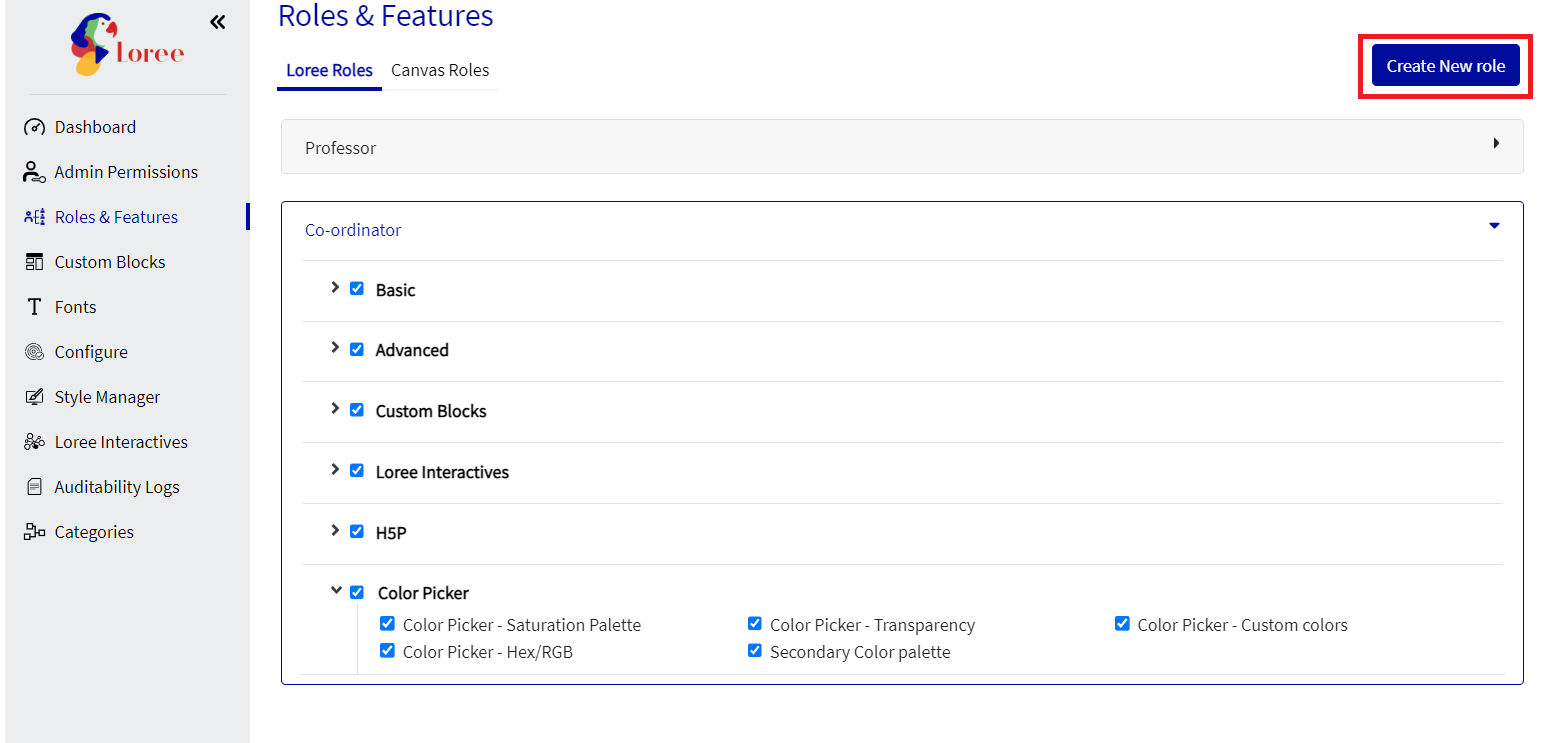
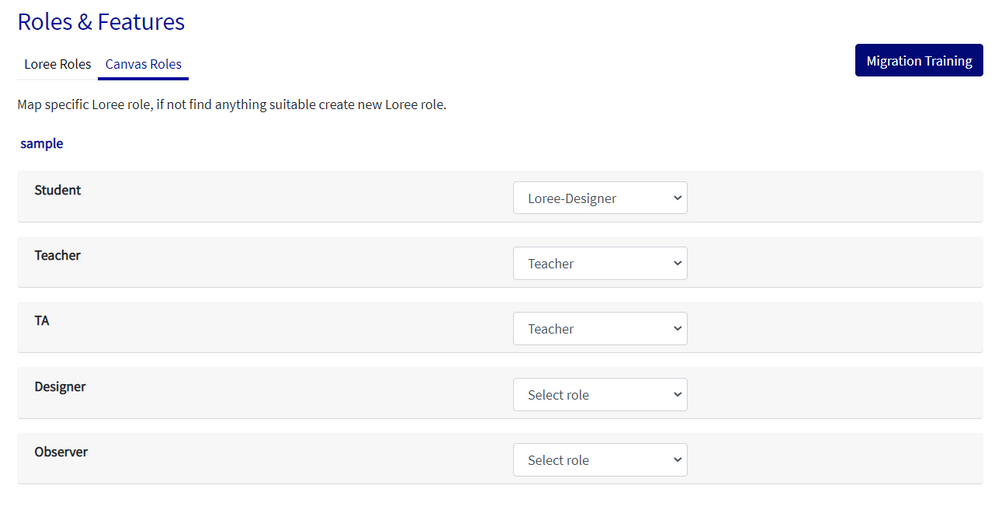
Roles & Features
Once after switching to the Loree Admin Dashboard by clicking the Admin button, the user will be able to see the Roles & Features Accordions and their corresponding Tabs,
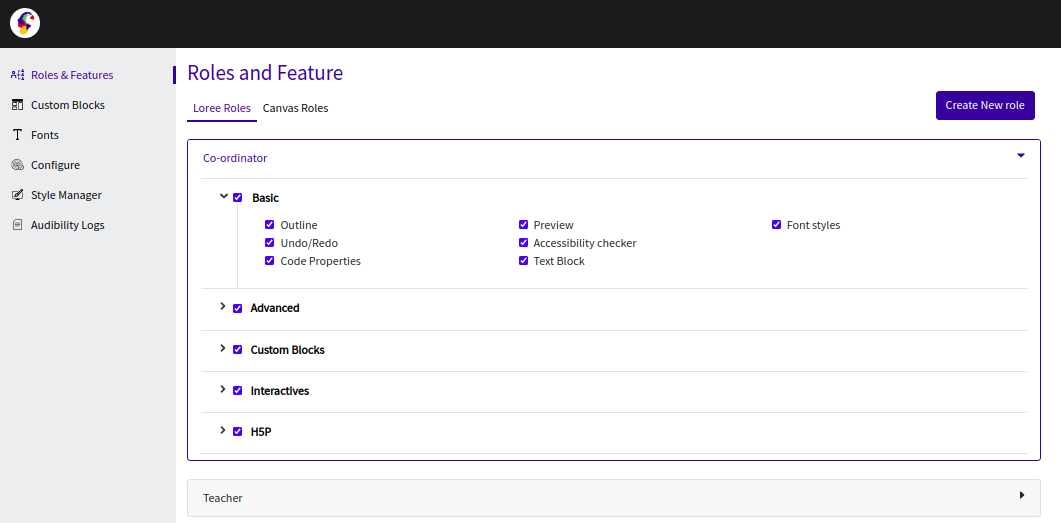
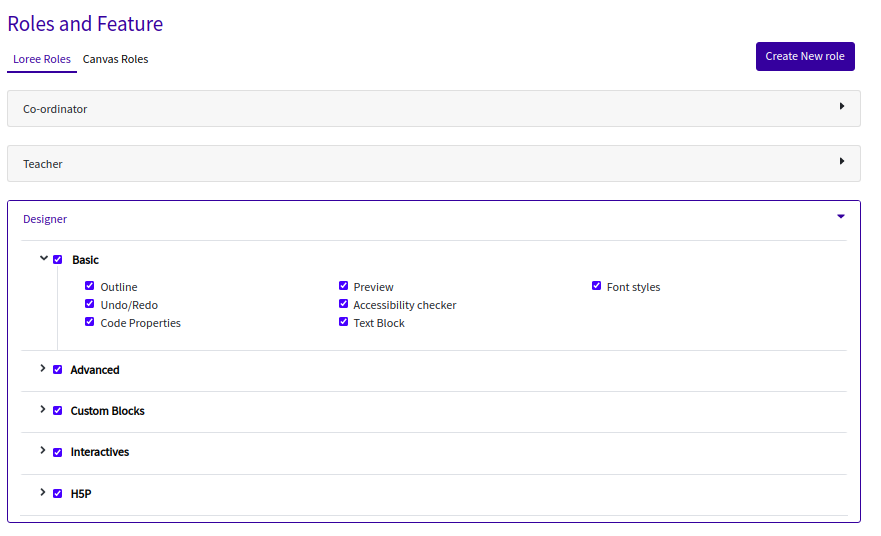
Loree Roles
Loree Roles will take care of the features for a particular role. By default, the Teacher and Designer Loree Role with all the features enabled will be created by Loree. In detail, when the Admin enables/disables features for a role say Teacher or Designer, or Create New Role (the admin can create a new role by clicking the Click New Role button in the right corner) say Role 1 or Role 2, these roles should be mapped with the Canvas Roles (Course role of a user) to get the desired features in the Loree editor.
Note: Account The account admin of the Canvas instance will get all Loree features by default.
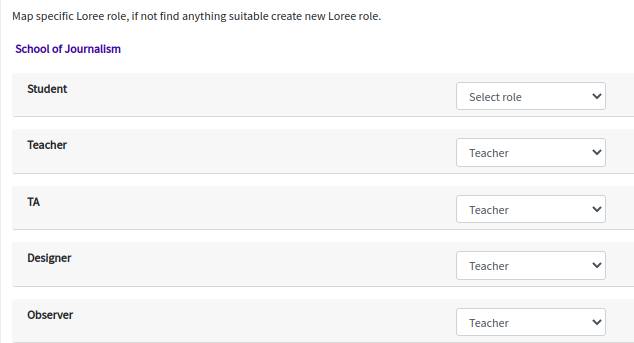
Canvas Roles
Canvas Roles will fetch all the roles in the sub-account of the course that you have entered. And if you have entered a course that is not created under any sub-account then your Canvas instance will show all the Root account roles and if the Admin switches to Sub-Account then it will fetch the roles in the particular Sub-Account. Once the Loree Roles are created by using the Loree default role, the Loree Roles should be mapped with the Canvas role which is the role based on the particular course role(Canvas course navigation → People → role assigned).
Note: ‘Select role’ (default - dropdown select) will not assign any features or roles.
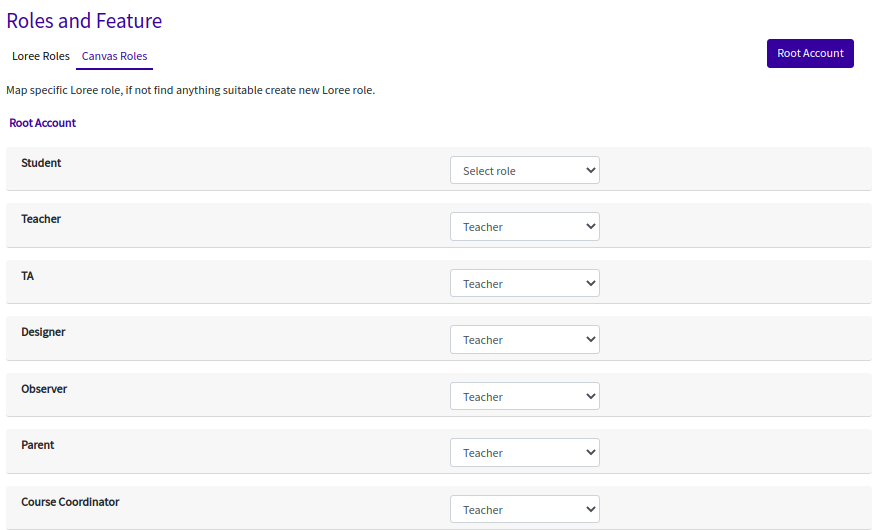
If the Admin mapped the Loree roles for the 'Root Account' then it will reflect in all the Sub-Accounts and courses. Also, the Admin can map the Loree roles based on the Sub-Account in the Canvas instance by clicking the Root Account button.
Select Root Account accordion for its Sub-Accounts,
 Sub
SubThe sub-Account list will be fetched and can select the desired Sub-Account which roles to be mapped,
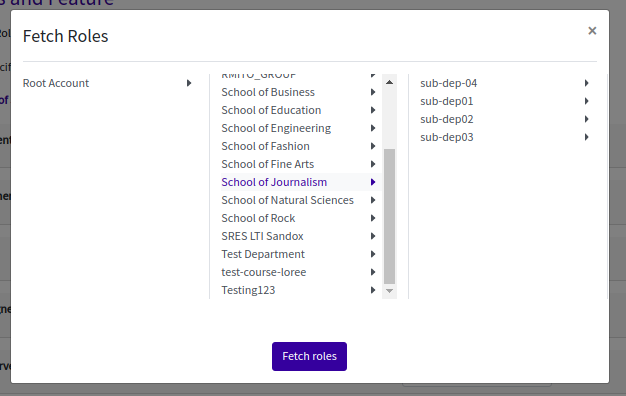
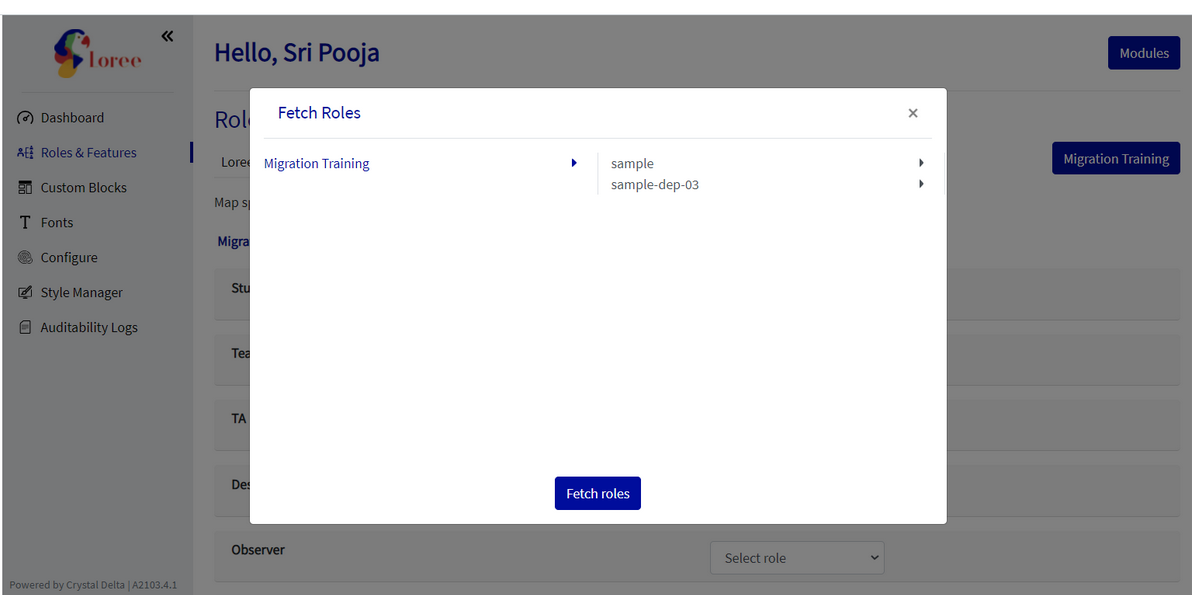
Click the 'Fetch roles' button to fetch the
sub-Accountssubaccounts roles, and map the desired Loree roles.
If the admin has entered a course that is created under a sub-account then the admin will only have the access to update roles and features for the course he has selected based on the sub-account of the course.
For Example:
If we are working on a course present in a sub-account named Migration training we can only map the roles for the Migration training Sub-account or its child account (sample, sample-dep-03) as mentioned in the screenshot below.

Custom Blocks
Custom blocks are the concept of saving or creating any of the template, row, or elements under any desired Name and Category. Here in the admin dashboard Custom Blocks, the admins can manage the Global and updating update the template name, and category and see the details of the Custom Blocks.
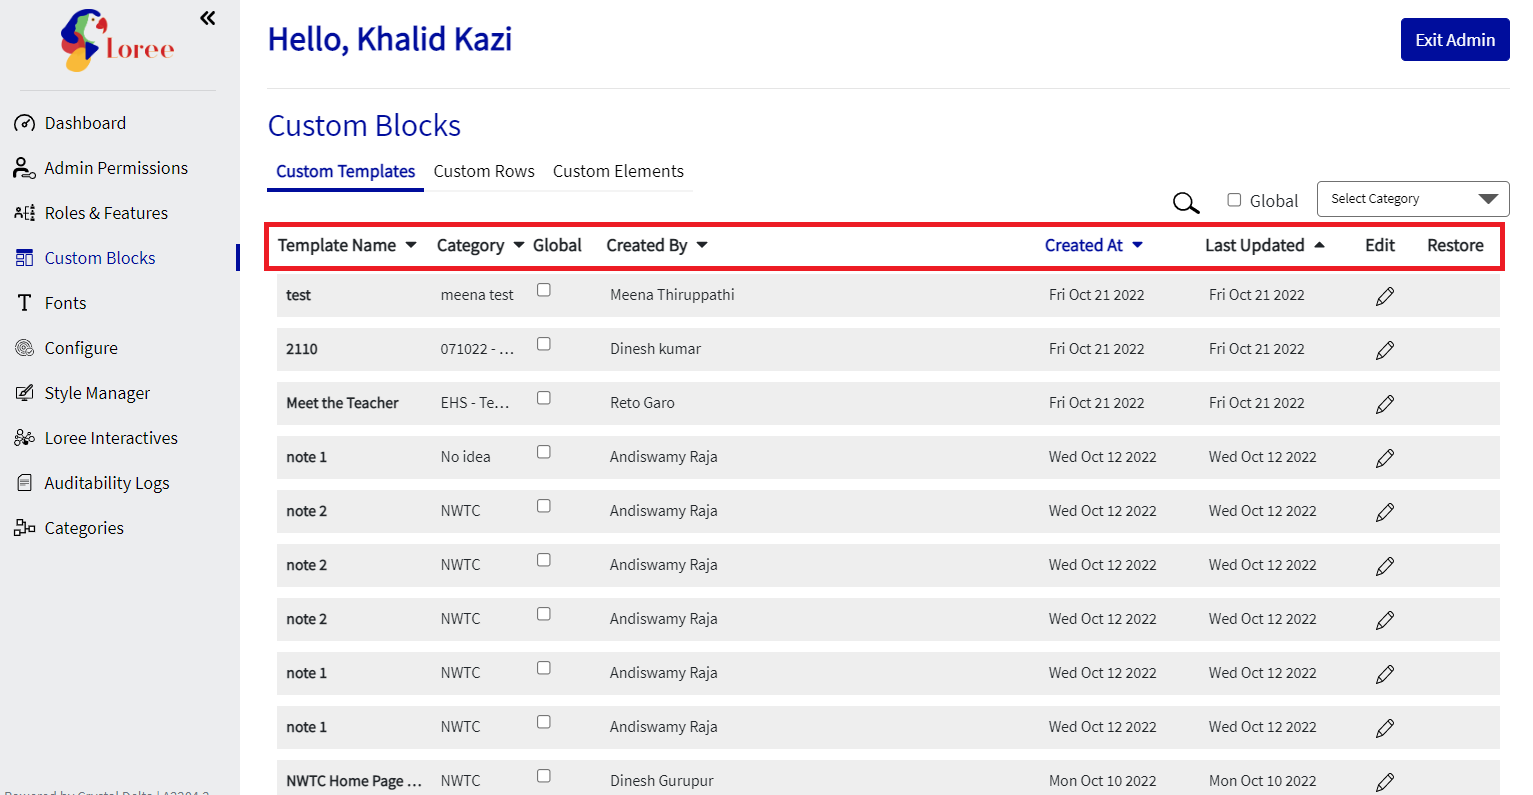
Custom Templates
Custom Templates are the templates we’re saving or creating inside the Loree editor. In this tab, the admins can update the template to Global or make the global template non-global, can see the details of the template like category, created by, created at, and last updated columns, and can also update the template Name and Category, Search the desired templates and even search the templates by Category just by clicking Category dropdown in the right corner. We have an organization limit on templates. So we will be able to view only the templates within the organization. Now we can only share/global/user templates within the organization.
Custom Templates with details, update button, search and category search buttons,
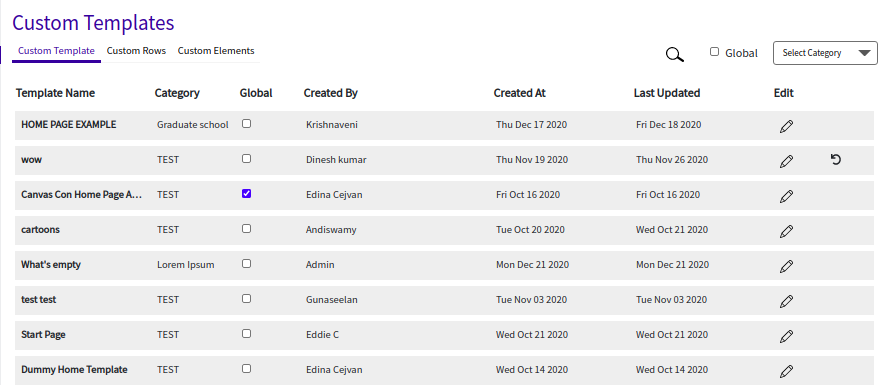
You can also sort templates by their name, category, Created by, Created at, and last updated
Search filter,

Category search option,

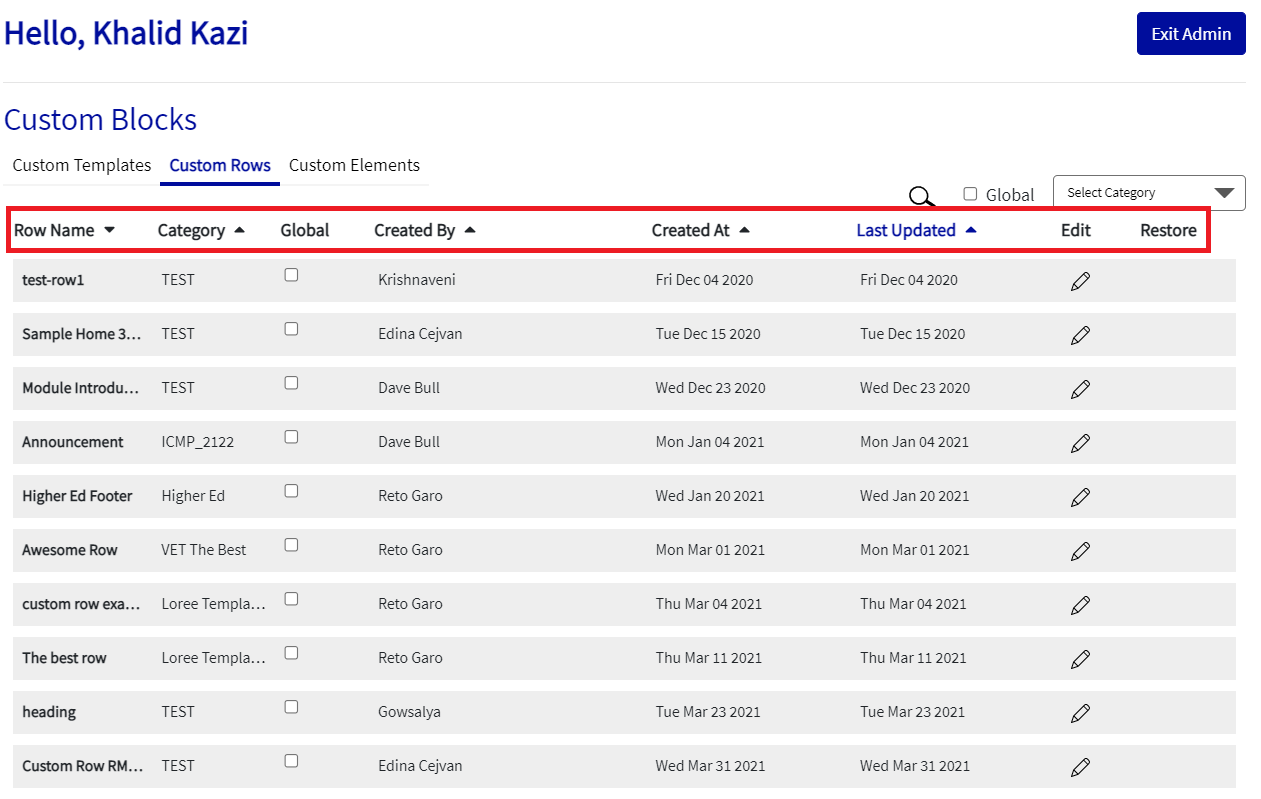
Custom Rows
When we save rows in the Loree editor, it they will be fetched inside the Loree Admin dashboard. Custom Rows also have the options like making global and non-global, search optionoptions, category searchsearches, details of the template, and update updating the row name and category.
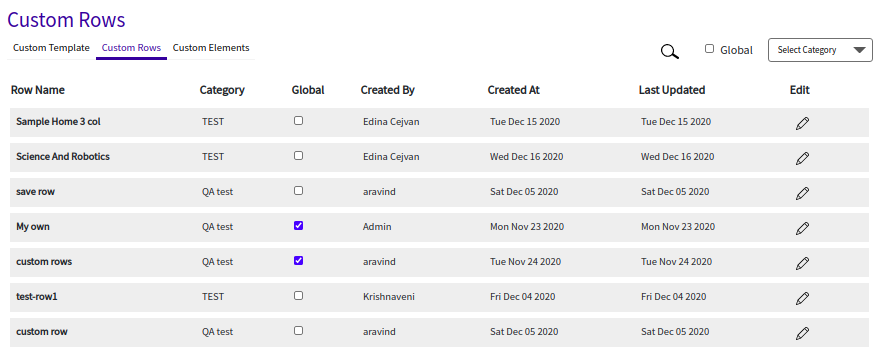
You can also sort custom Rows by their name, category, Created by, Created at, and last updated
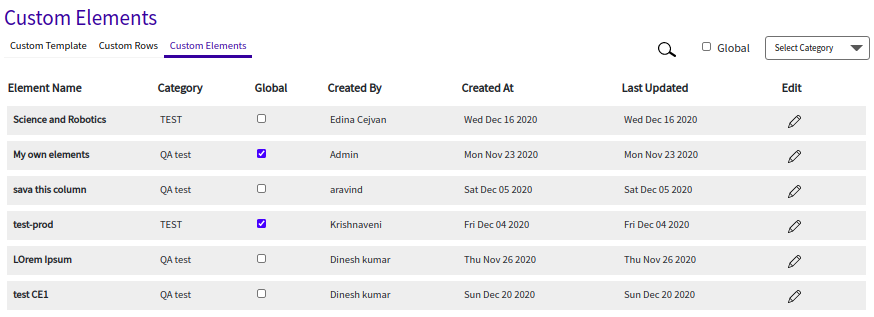
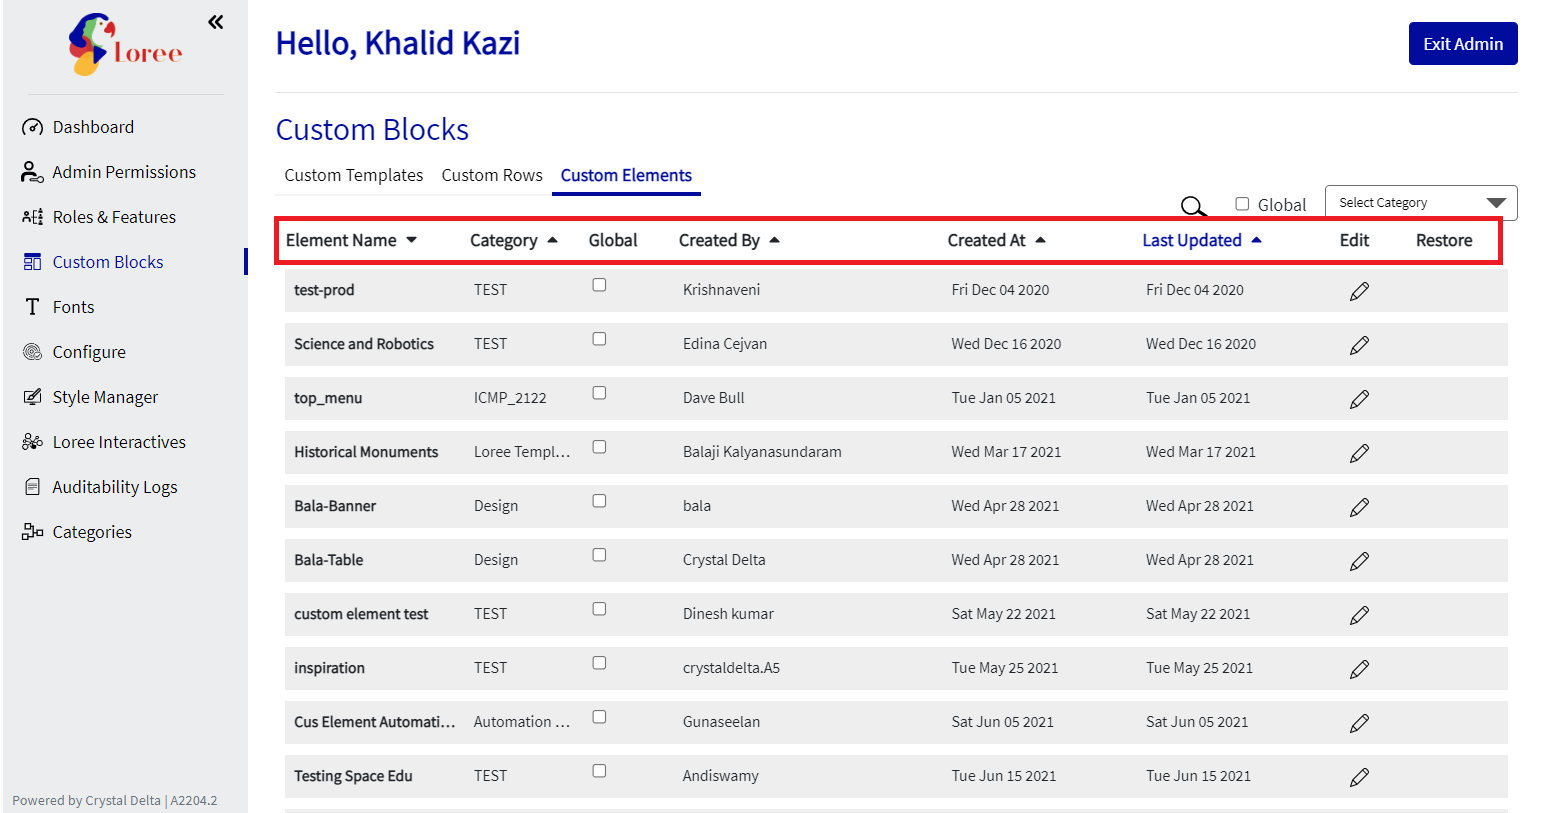
Custom Elements
When we save elements in the Loree editor, it they will be fetched inside the Loree Admin dashboard. Custom Elements also have the options like making global and non-global, search optionoptions, category search, details of the template and update updating the row name and category. You can also sort Custom elements by their name, category, Created by, Created at, and last updated.
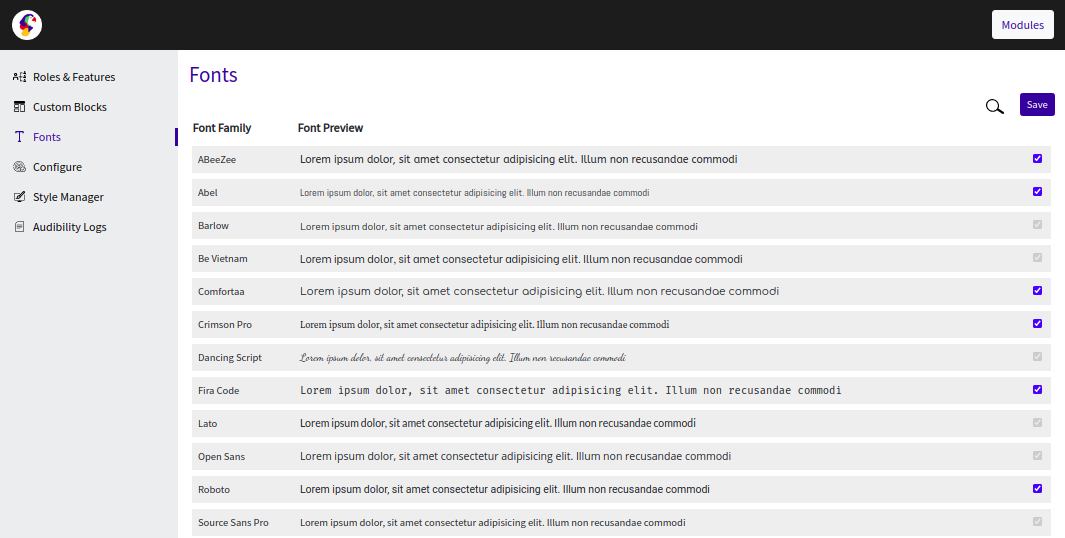
Fonts
Loree has 900+ google fonts in the Fonts option in the Loree Admin dashboard. Any of the organization or desired fonts can be enabled and Save (in the right top corner) to get it in the Loree editor.
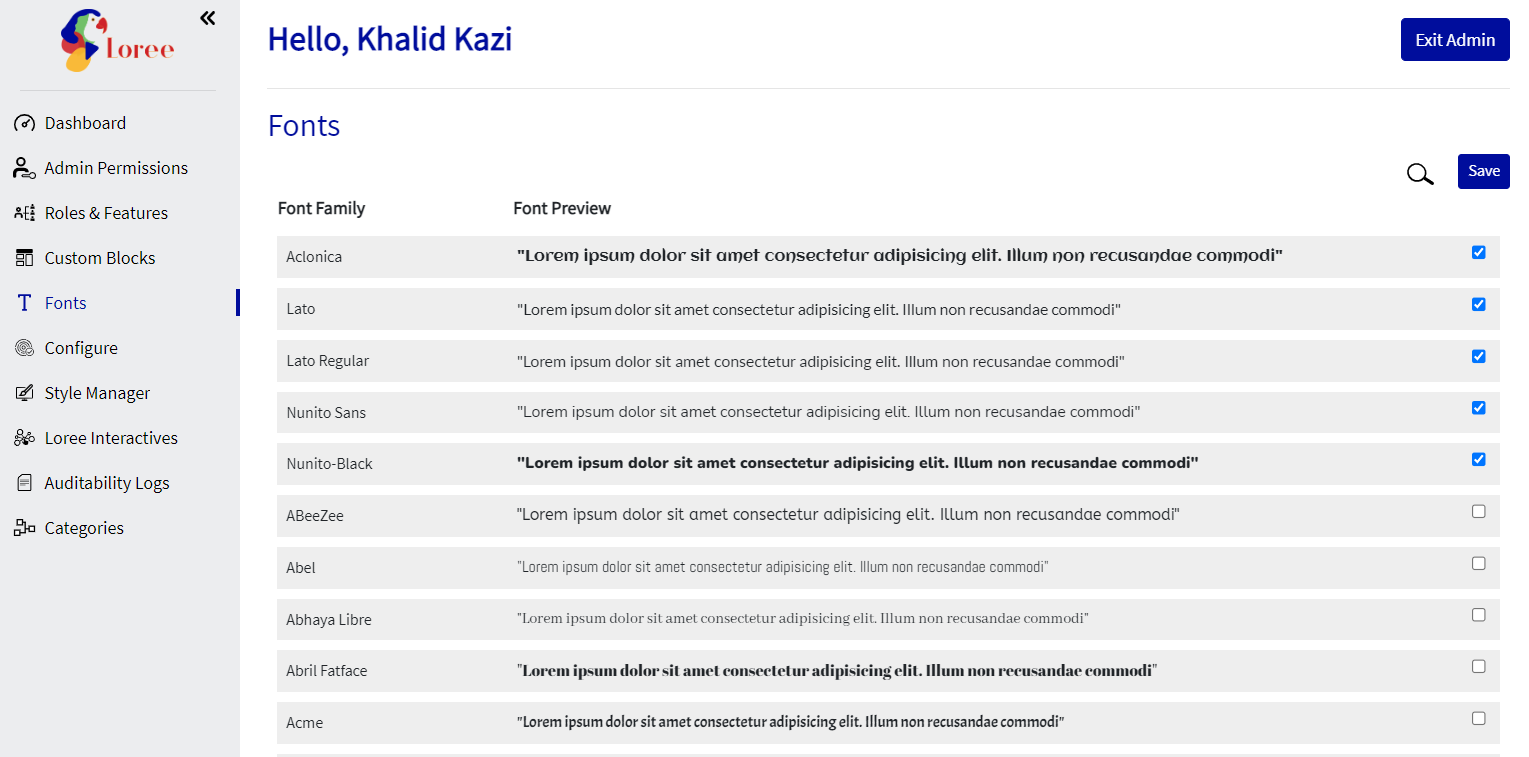
Default Fonts
Default fonts are the list of fonts that will be enabled and can’t be disabled in the admin dashboard and these default fonts will be in the Loree editor list, style manager list in the admin dashboard
The default fonts are,
Barlow
Be Vietnam
Dancing Script
Lato
Open Sans
Source Sans Pro
Arial
Helvetica
Times New Roman
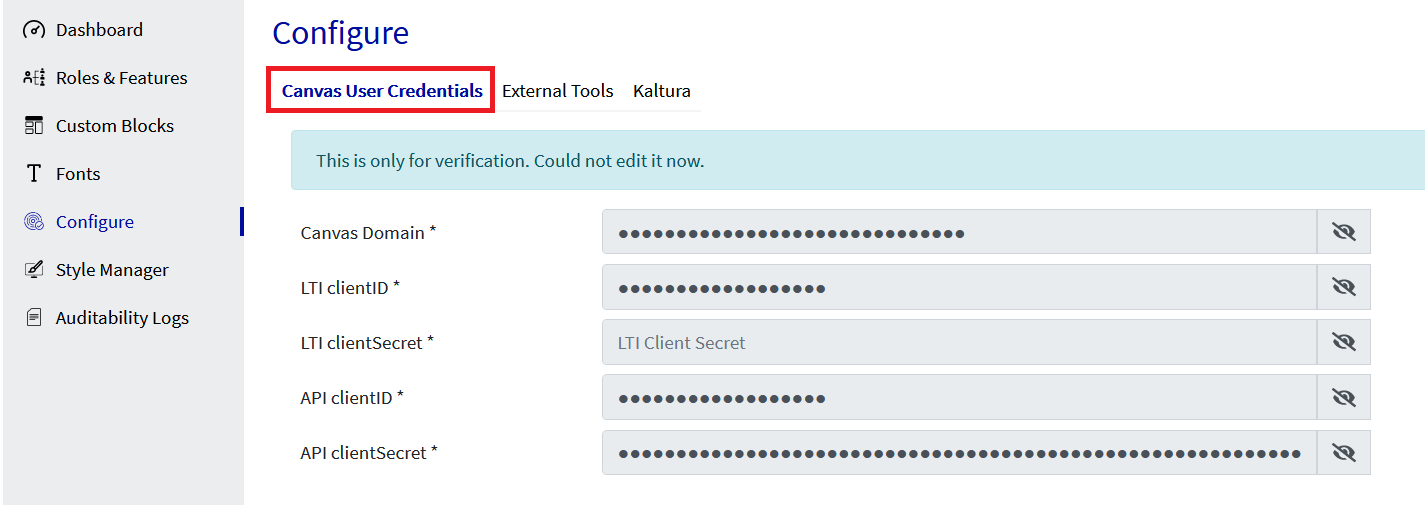
Configure
Configure Accordion in the Loree Admin dashboard will carry
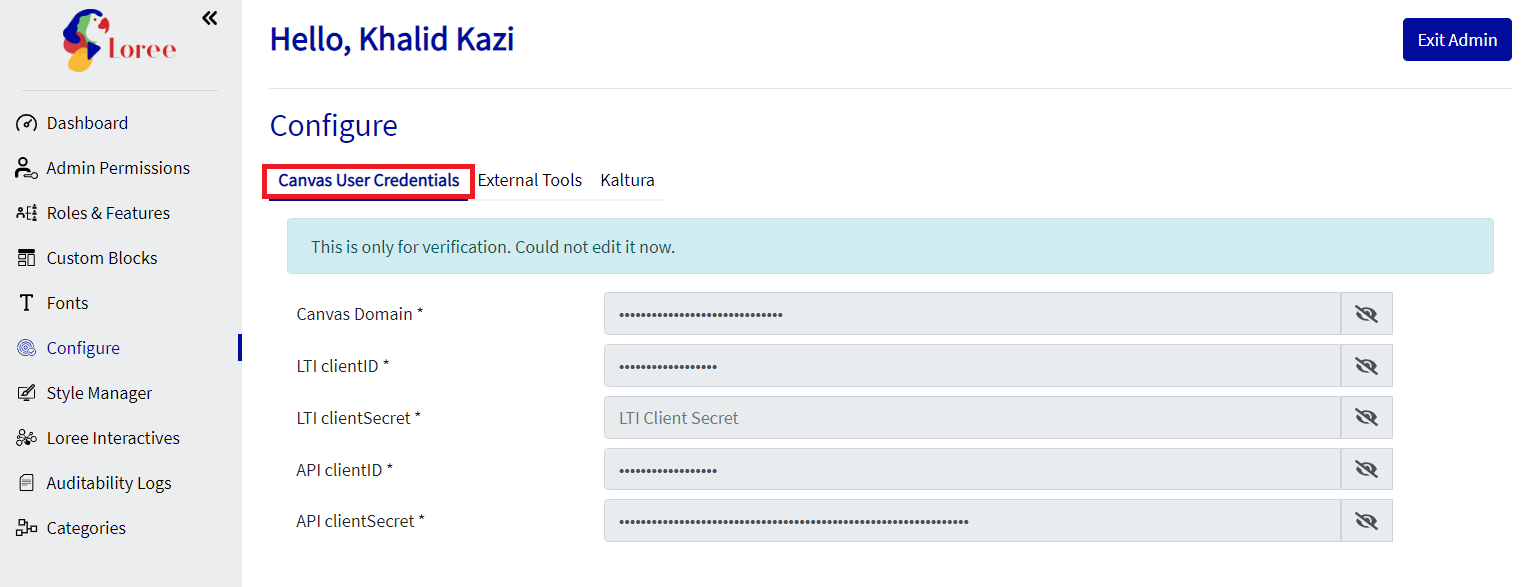
The Canvas credentials
This is a default configuration and can’t be updated.
External tool configuration
Create a new External tool configuration UI in the Admin dashboard
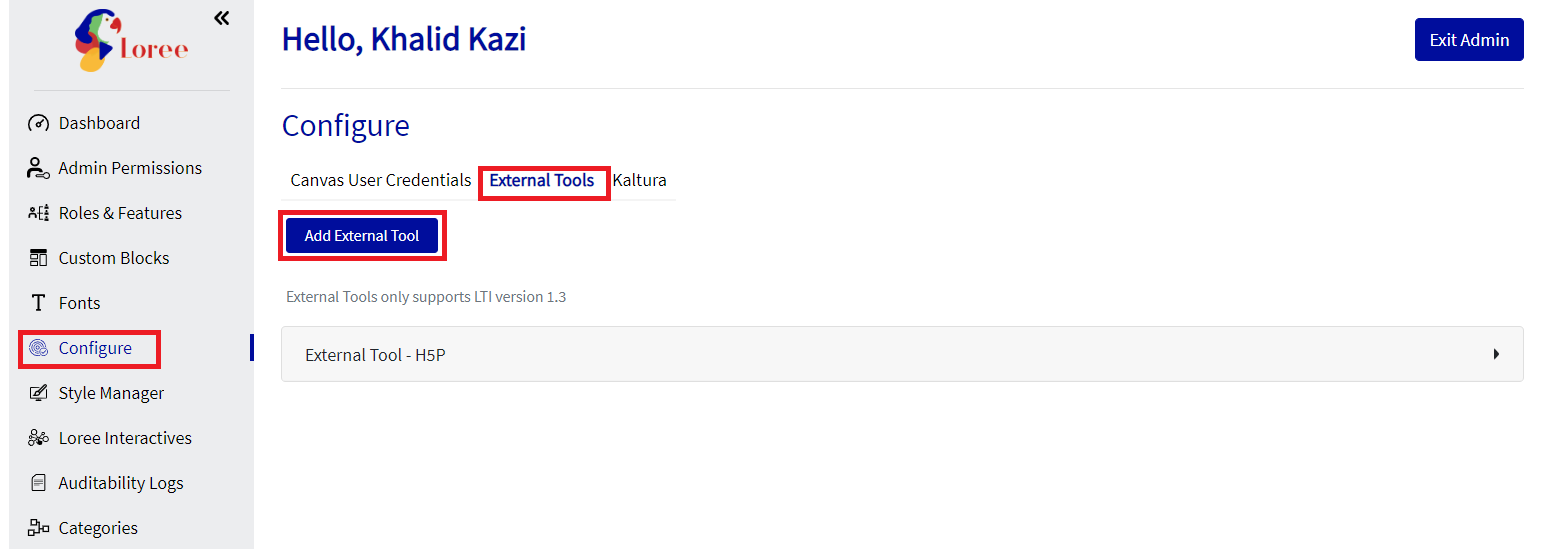
We have provided an option to add External Tools inside the Loree Admin dashboard. After opening the Admin dashboard → Configure → External Tools → Add External Tool.
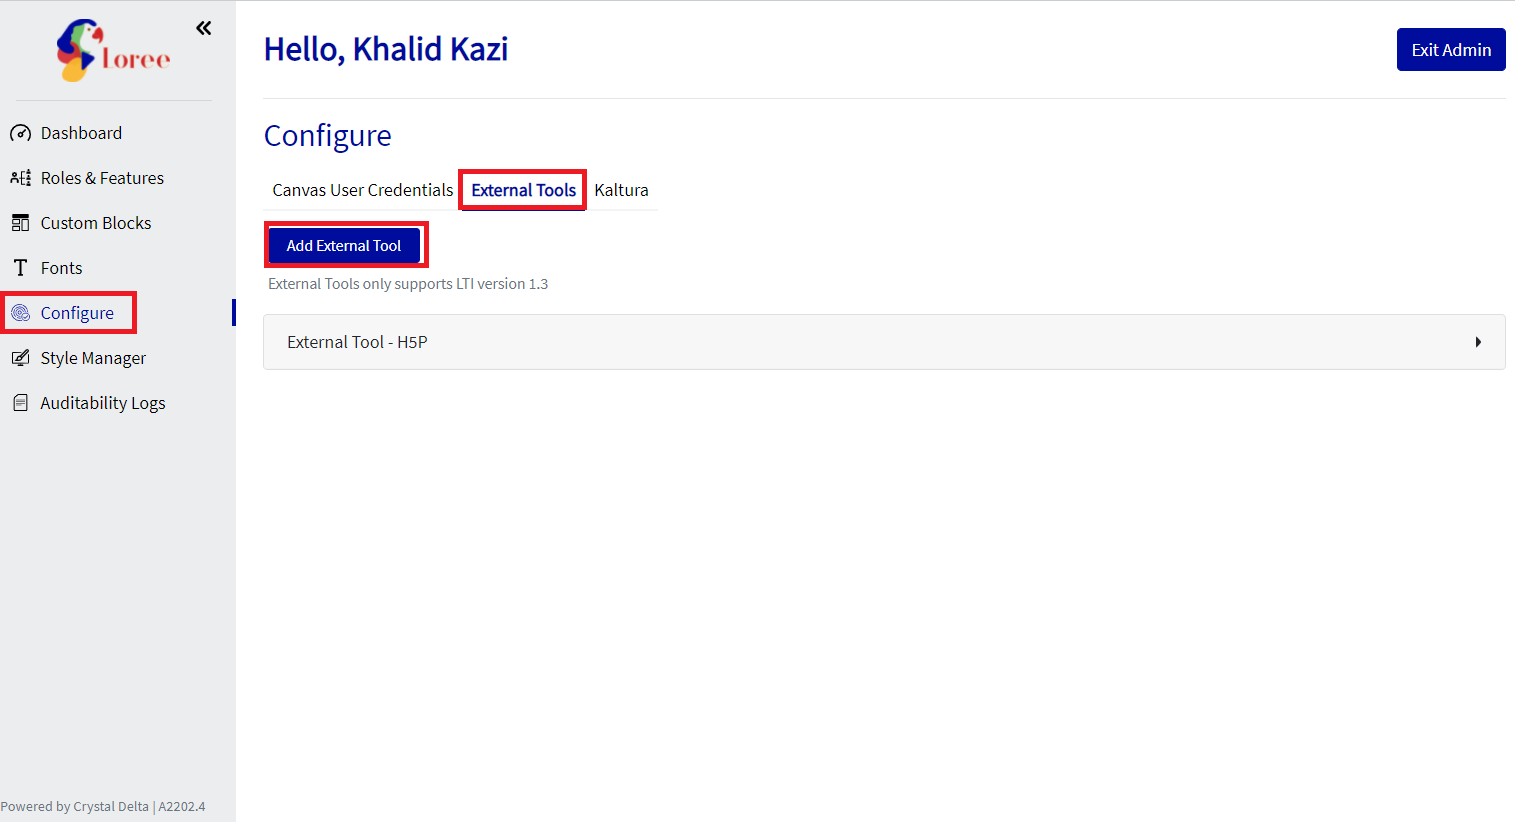
Once we click on Add External Tool we will get a popup window as Pick your tool type, We can select Others and click on Add.
While filling a new external tool field
Add External Tool button will be disabled once the admin clicks on the buttons and start filling in data.
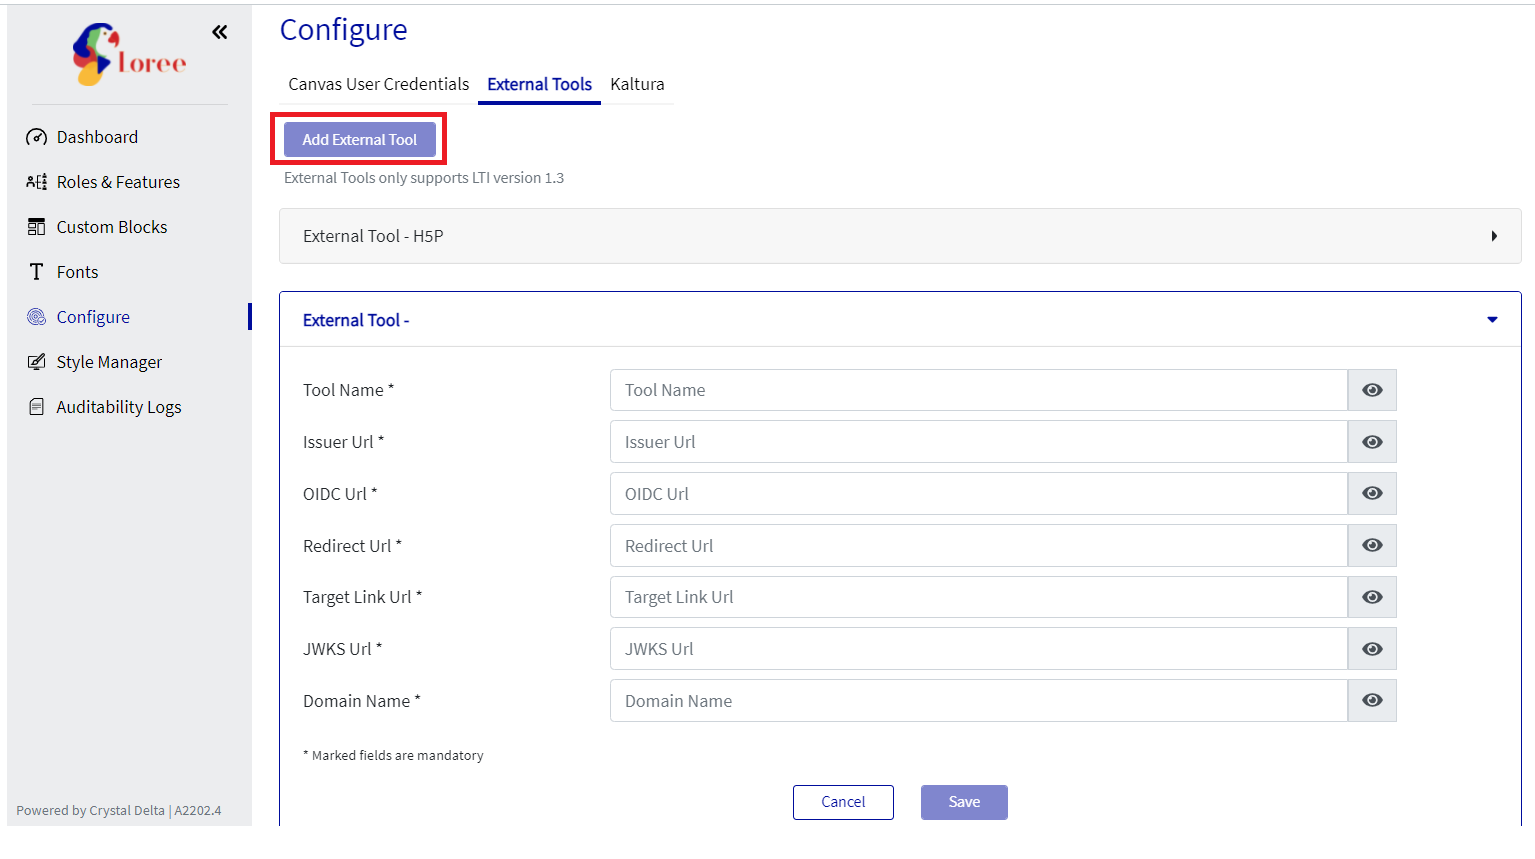
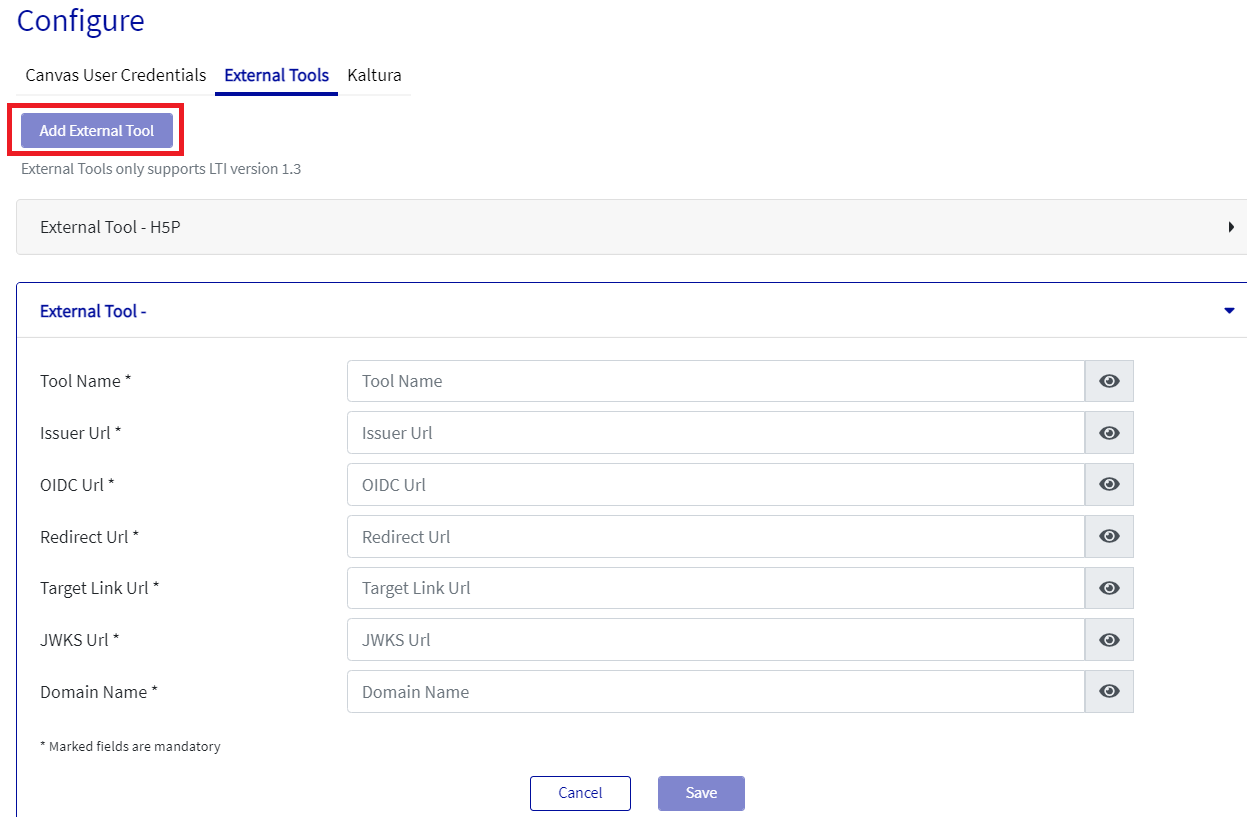
The Save button will be disabled until all the mandatory fields are filled and will enable once all the input data is updated.
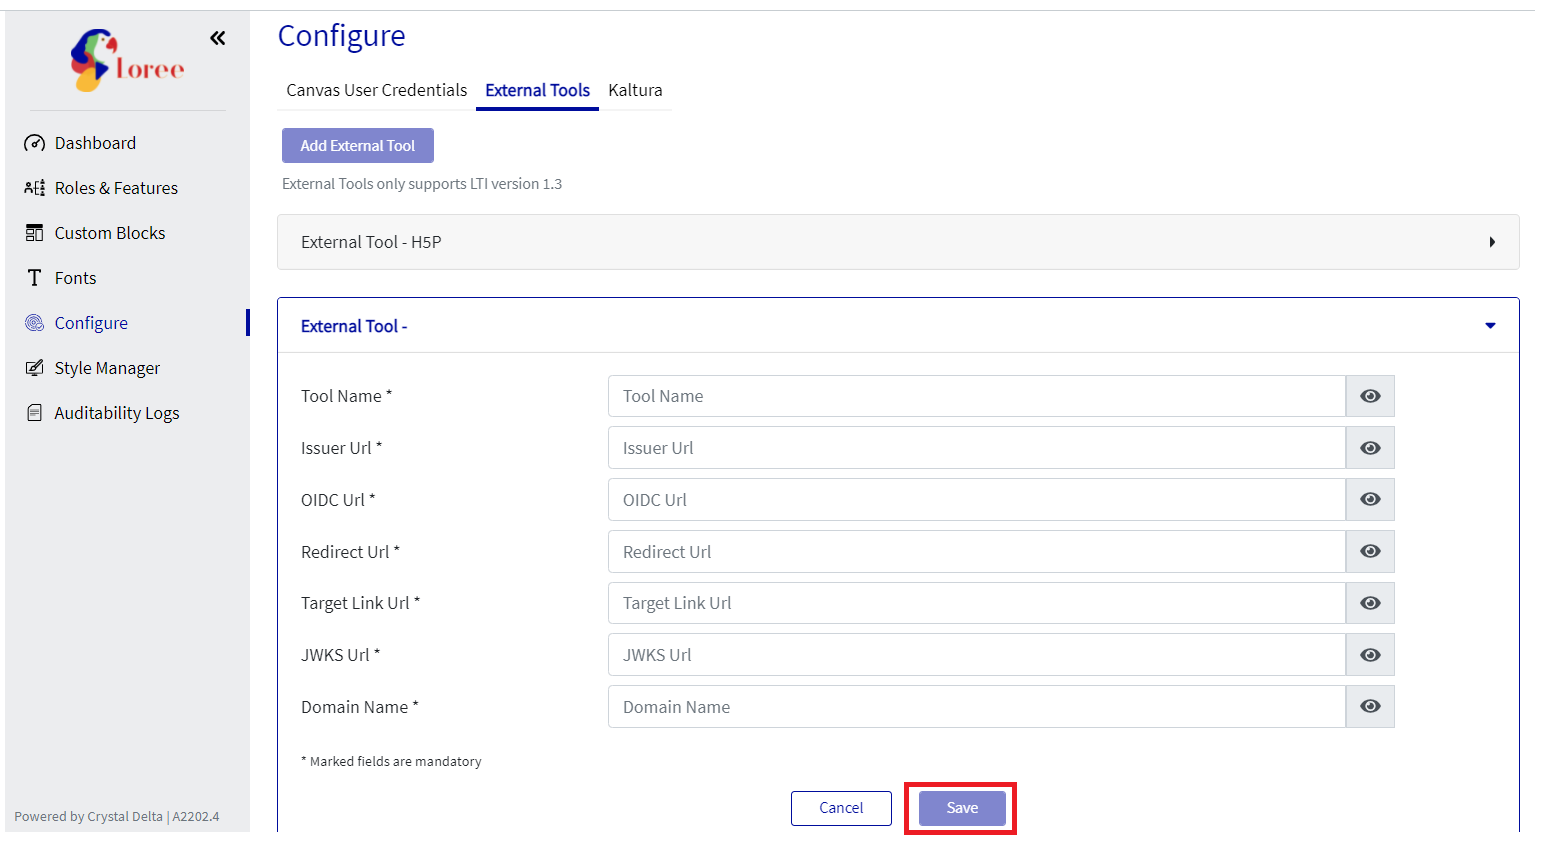
Once the new external tool data is created and applied on Save by the admin user, the Add External Tool button will be enabled for the next creation.
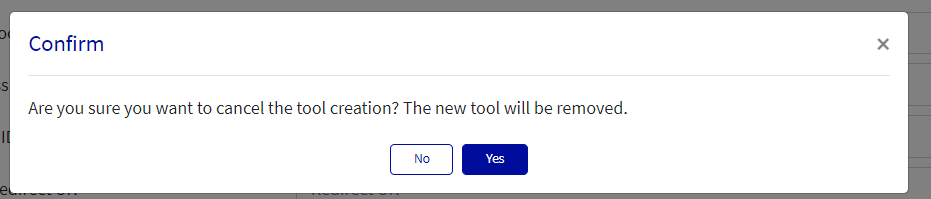
If the admin user is canceling the external tool before saving it, then there will be an alert message on the screen as “Are you sure you want to cancel the tool creation? The new tool will be removed.“ If the admin user clicks Yes then the External Tool will not be added and the accordion will be deleted. If the admin user clicks No they can continue to create the External Tool.
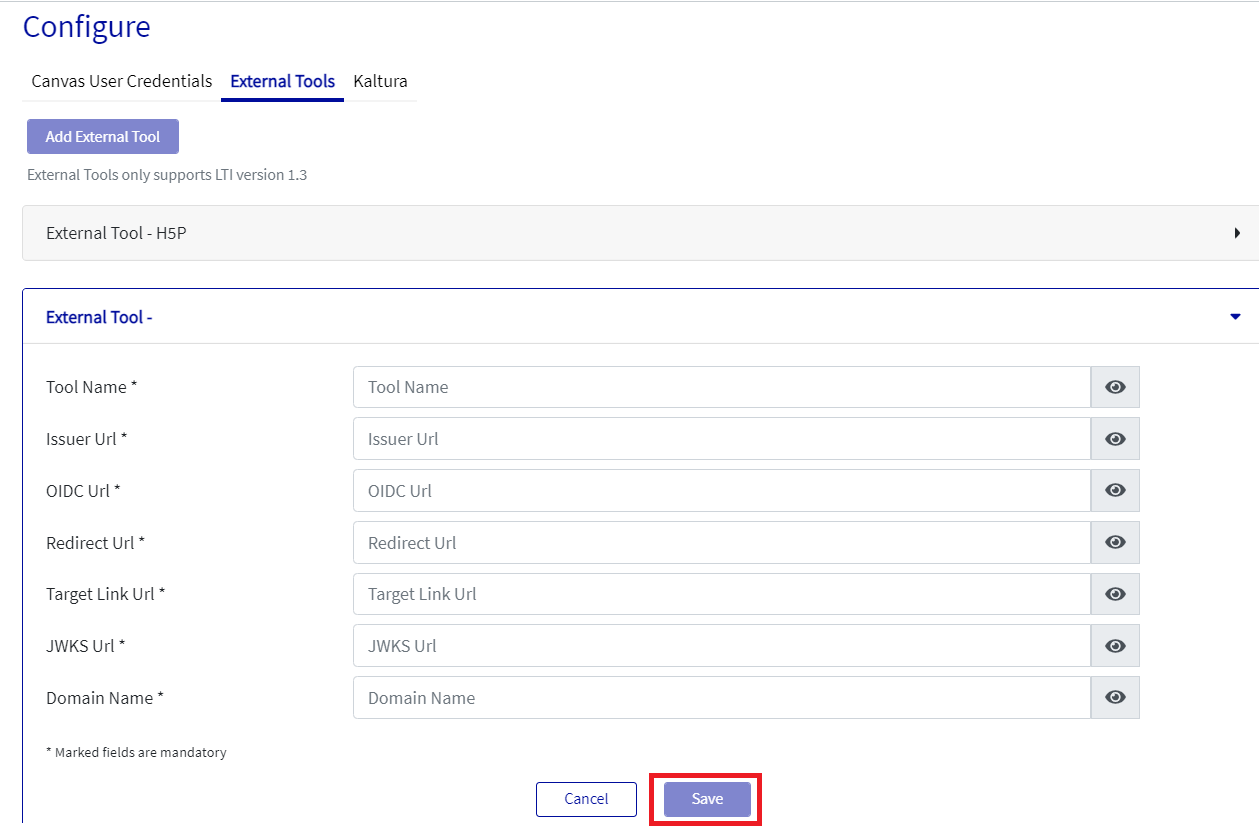
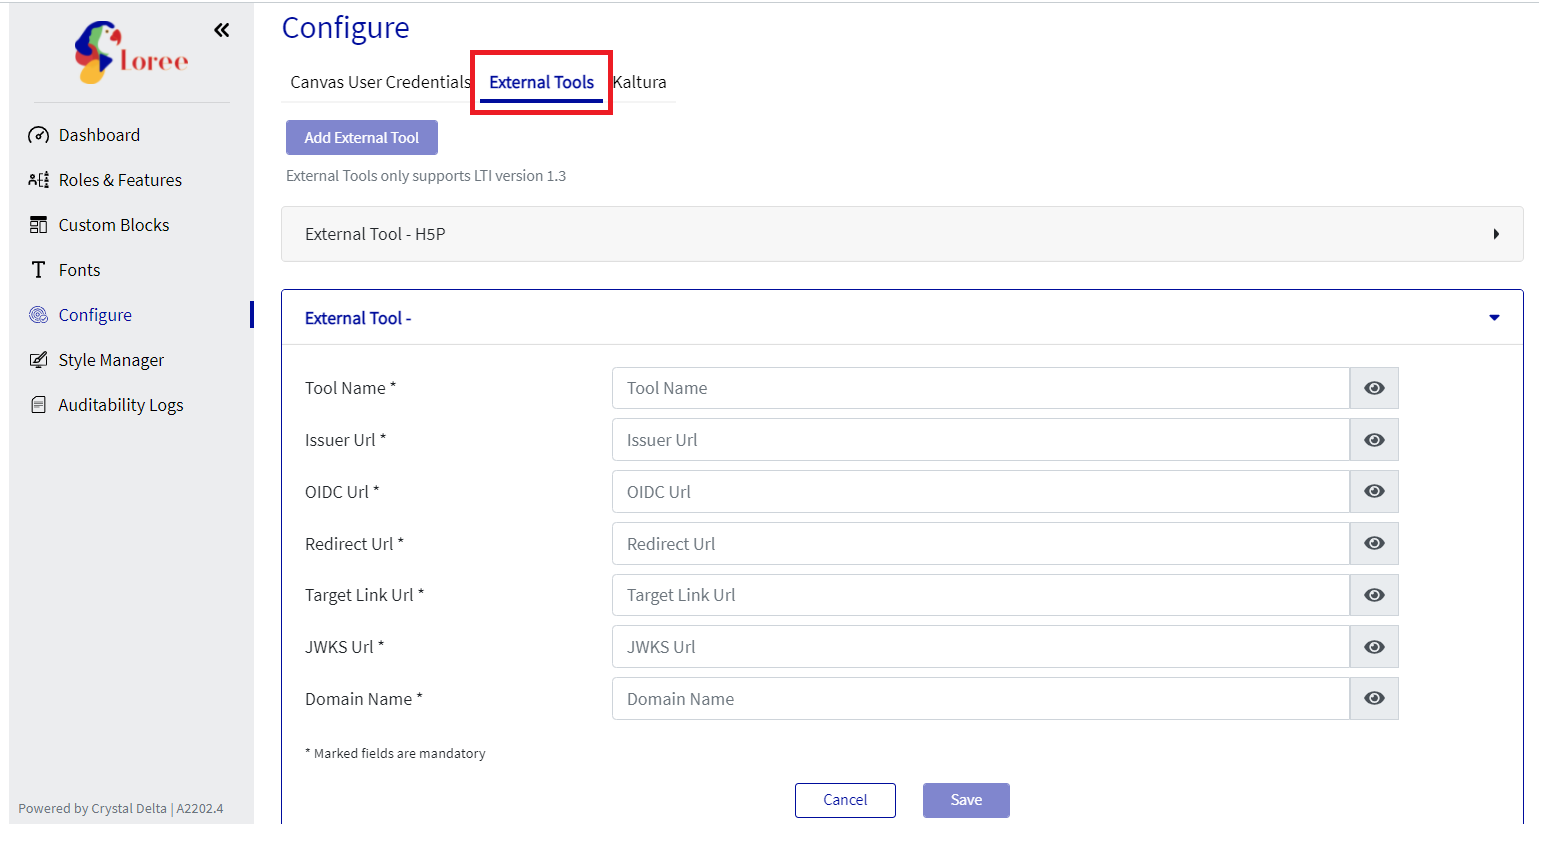
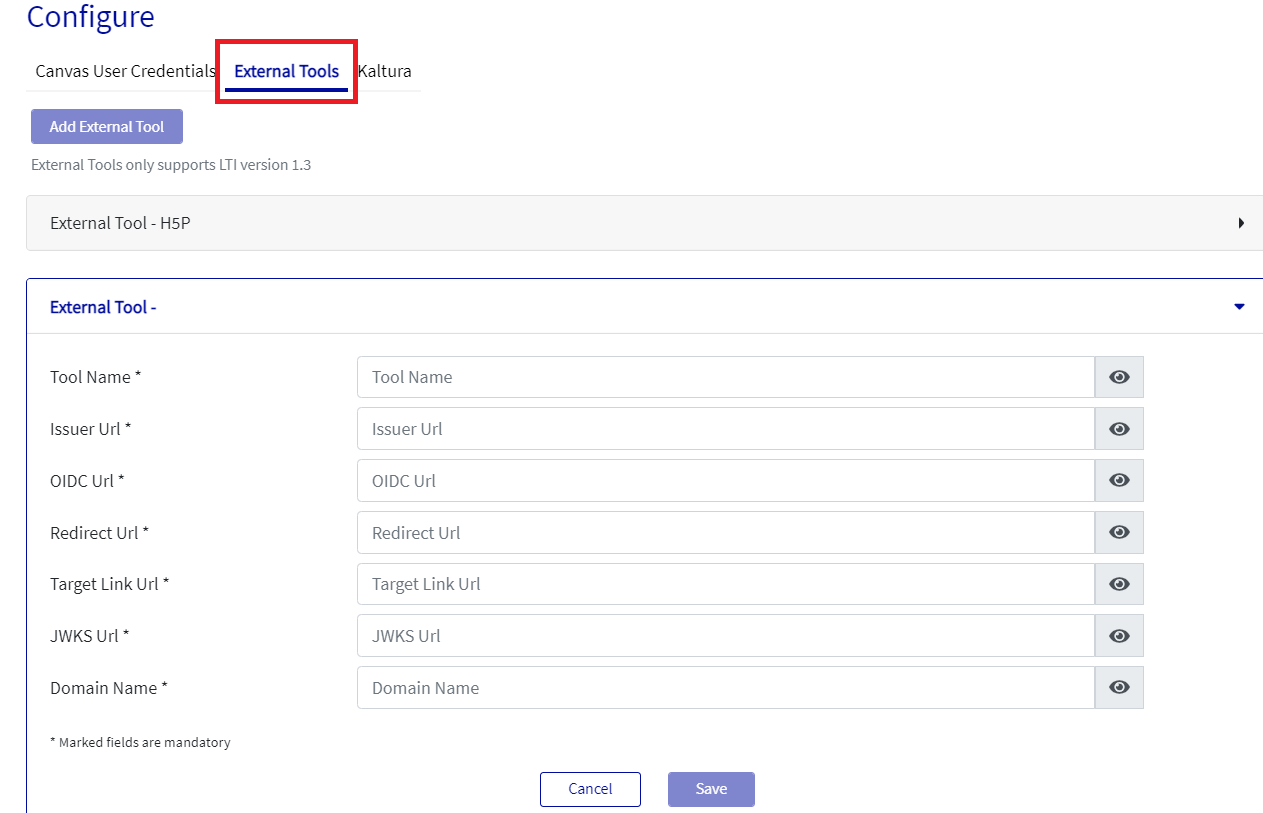
Configuring tools UI as Tabs in the admin dashboard
The active tab from Canvas User Credentials (LMS User Credentials), External Tool, and Kaltura will be bold and underlined like in UI.
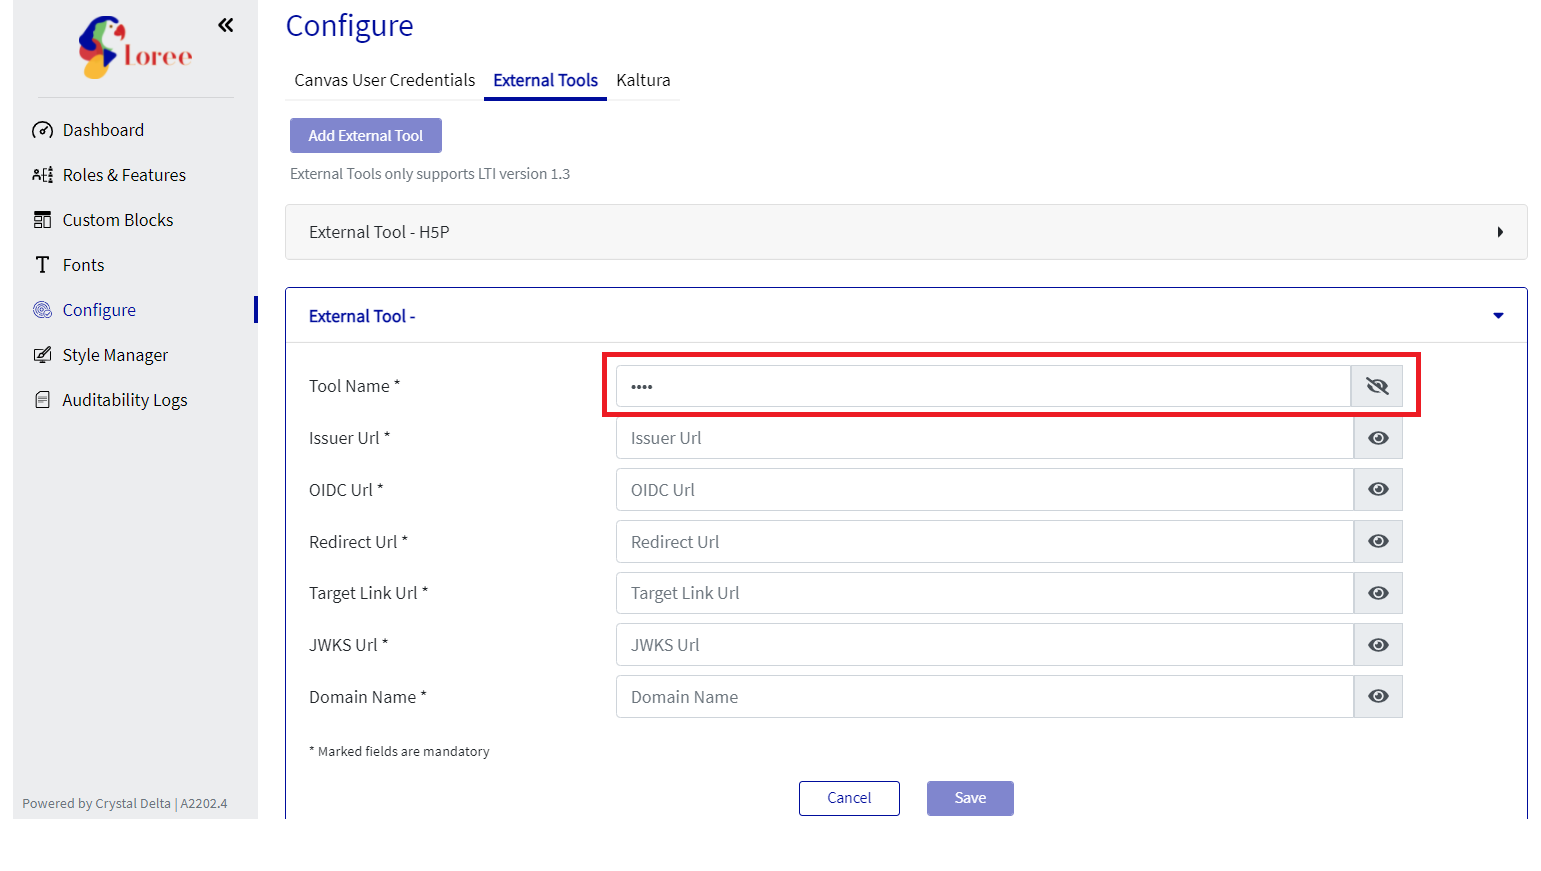
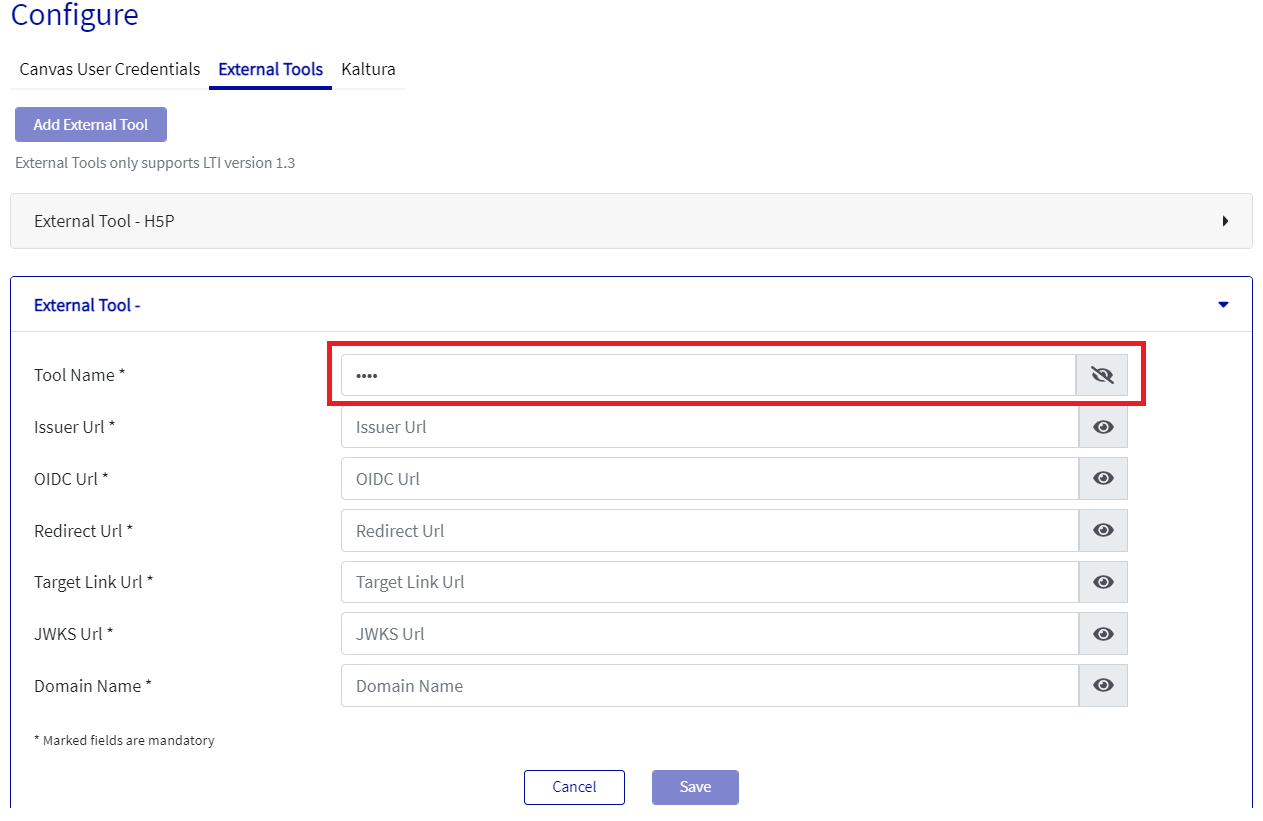
Once the Eye icon is clicked the inputs will be disabled and the admin cannot view will details also as shown in the screenshot below.
Edit the External tool configuration UI in the Admin dashboard
Once the External Tool is created admin can Edit the details by clicking on the Edit button.
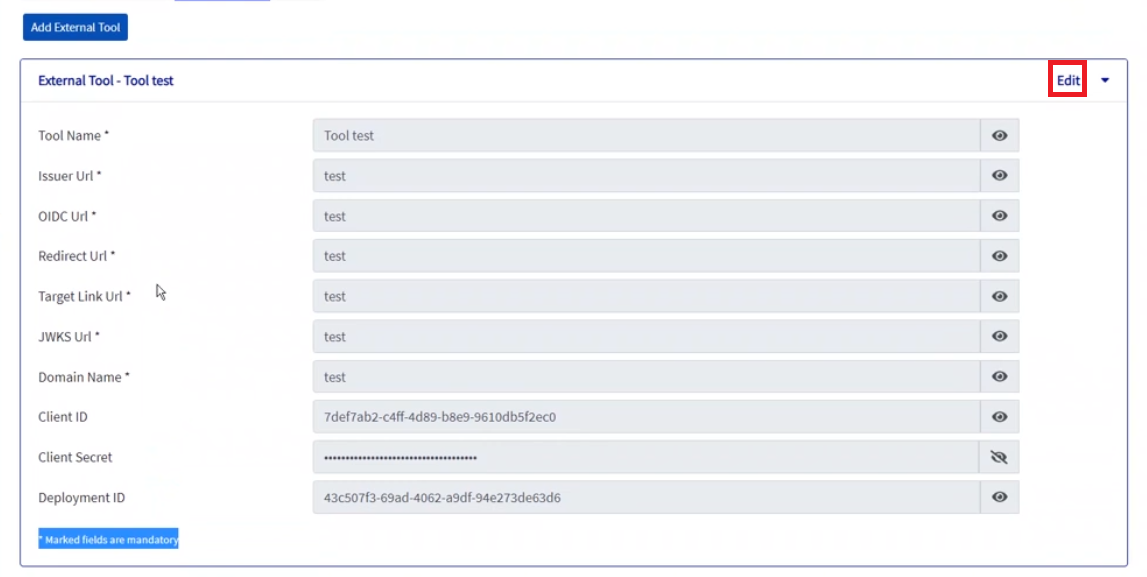
Once the Admin clicks on the Edit button the fields that can be edited will be enabled and the Edit button will be disabled. Client ID, Client Secret key, and Deployment ID will remain disabled as those fields can’t be edited and are only updated at the backend.
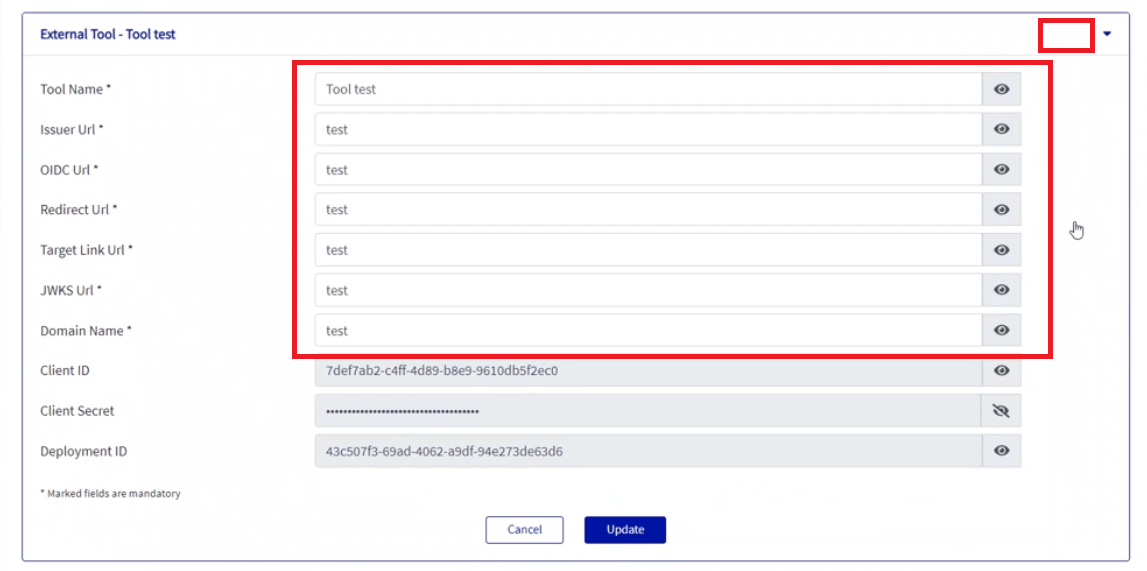
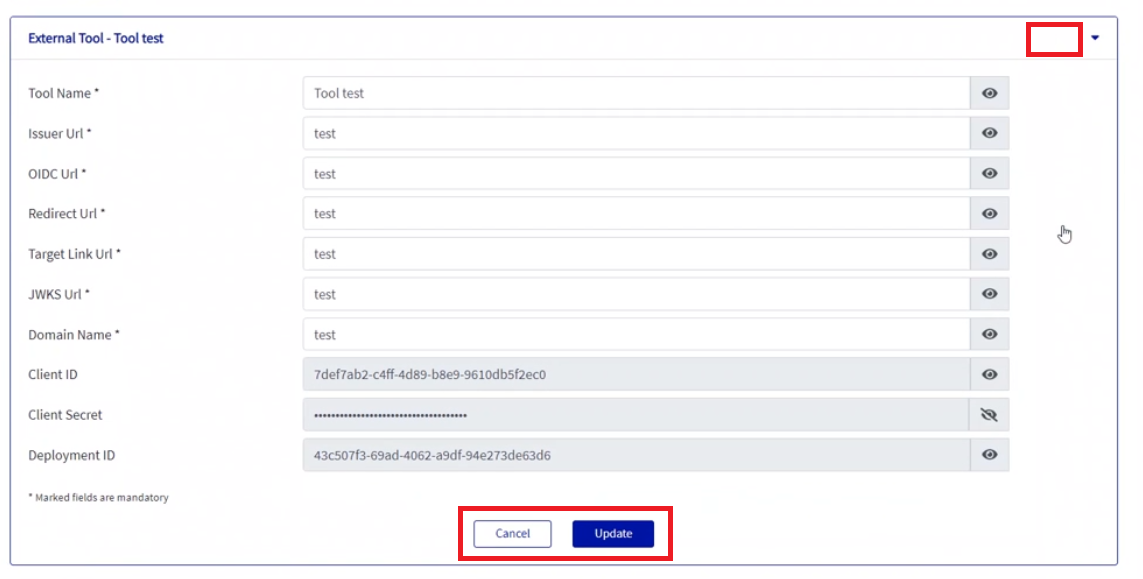
After Editing the External tool details we can click on Update and the details will be updated and if we click cancel previously-stored details will be restored.
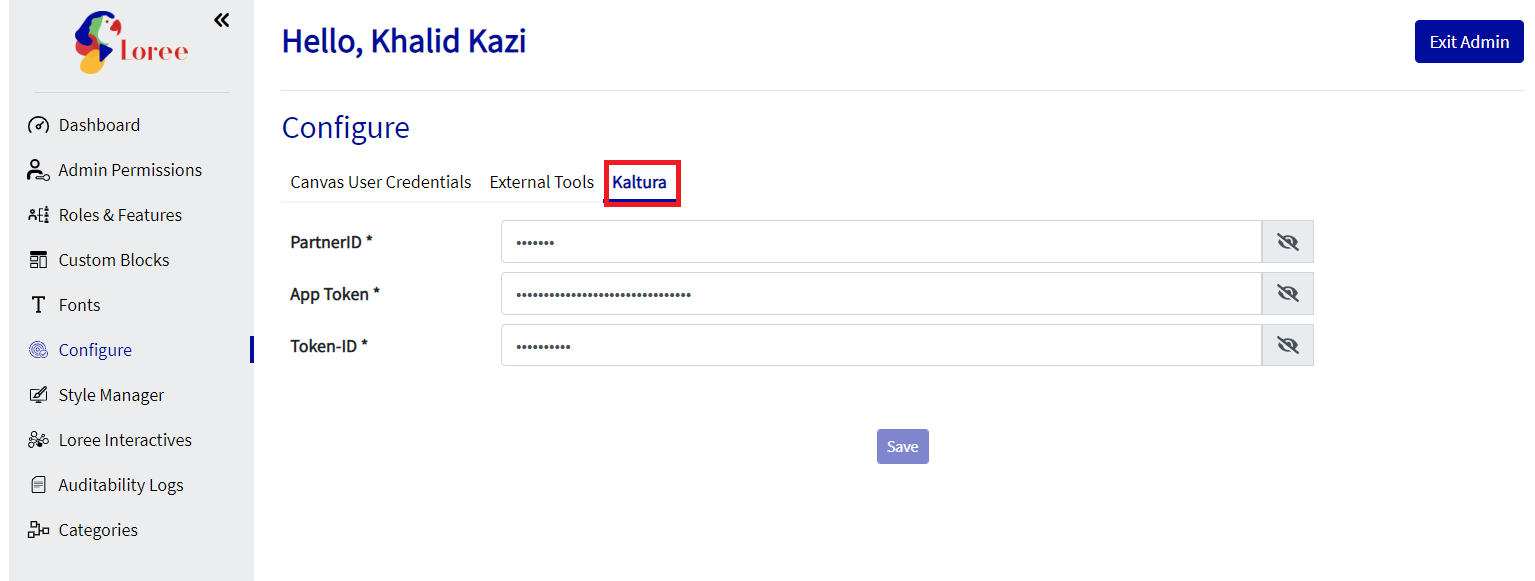
Kaltura credentials
This can be updated or added when Kaltura videos are in.

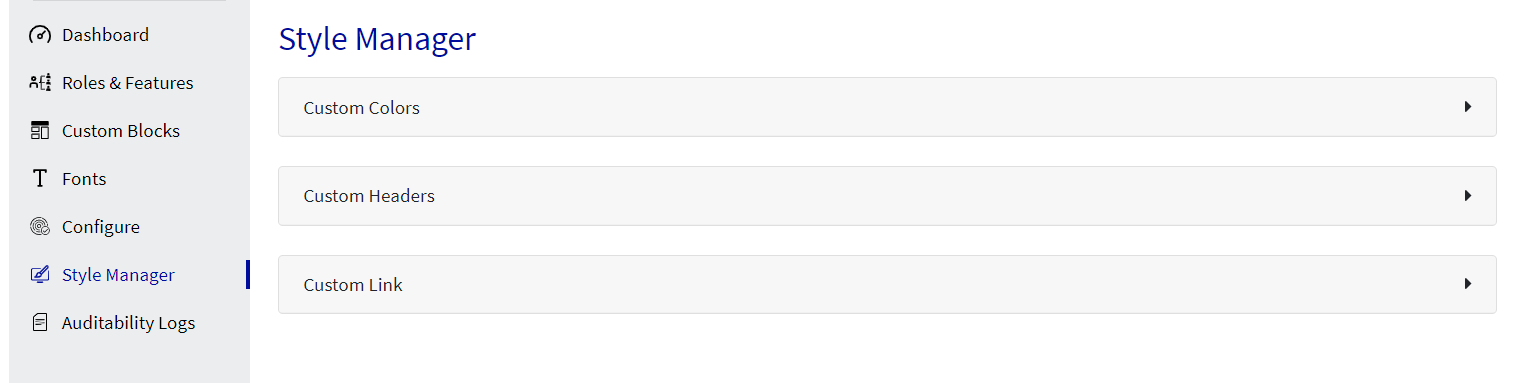
Style Manager
Style Manager Accordion in the Loree Admin dashboard will carry three amazing customization options in the Loree editor. The below sections will talk in detail about the Custom colors, Custom Headers, and Custom Links.

Custom Colors
We now have two options under Customs Colors, the Primary section is Global Colors and the secondary section is Additional Custom Color palettes.
Global Colors
Global Colors will carry a full-color spectrum palette in which any organizational or desired colors can be chosen and Saved (bottom of the Custom Colors accordion) to fetch inside the Loree editor to use for any of the Background, Border, or Font colors.

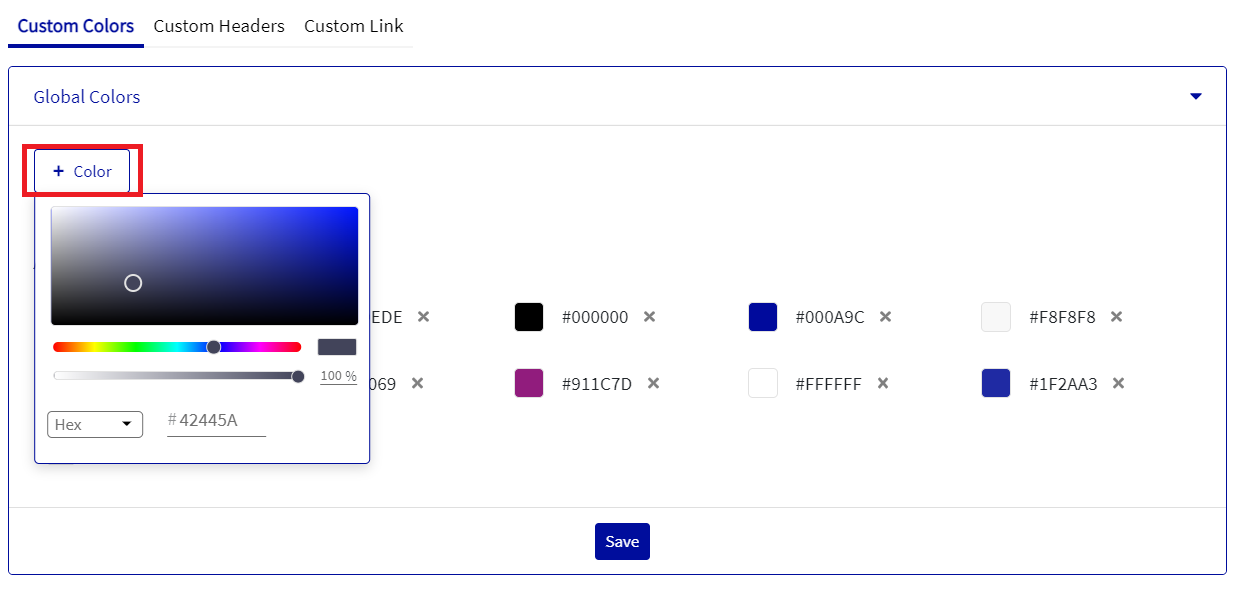
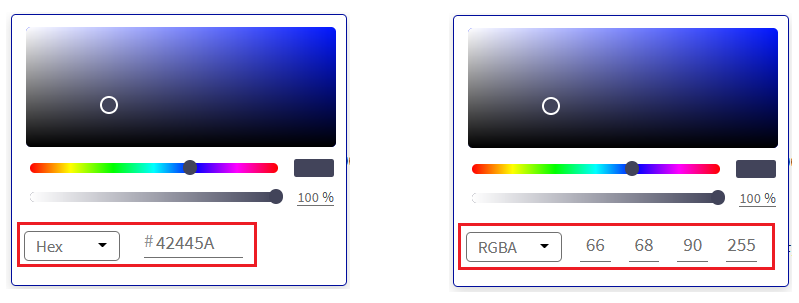
Once we click on the (+ Color) Icon and we will have the ability to either choose a color from a color scaling tool, input a specific Hex code for the color, or input a specific RGBA code of the color to be applied. We can choose options of Hex code and RGBA code from the dropdown.
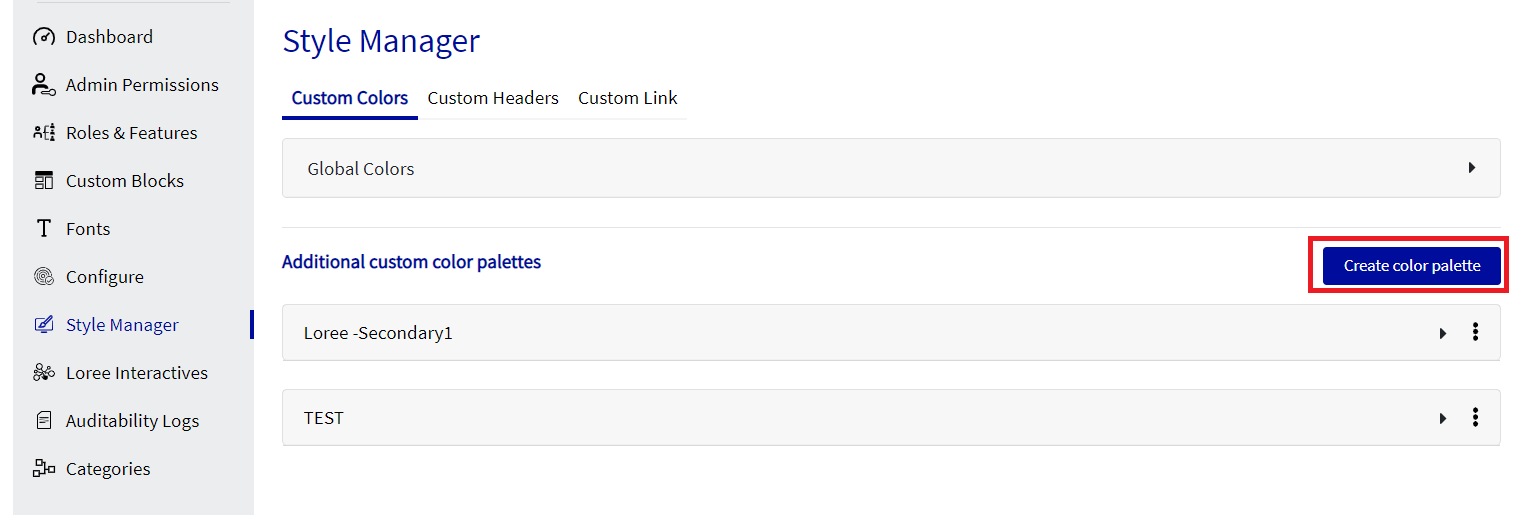
Additional Custom Color palettes
Additional Custom Color palettes are our secondary section. Here Loree admin will be able to create multiple color groups inside custom colors. and they can start adding the colors inside it and can share it Globally or with their organization’s particular sub-accounts.
To create a new Color palette admin can click on Create Color Palette under Custom Colors.
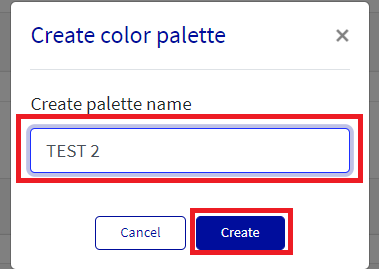
After clicking on Create Color Palette there will be a popup window where we have to update the name of the Color Palette. After updating the name Create option will be enabled we can click on it to create a new Color Palette.
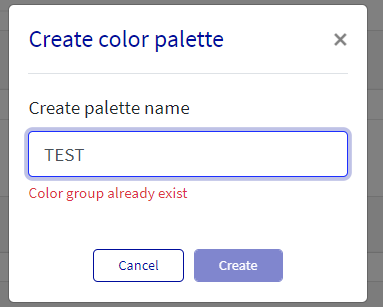
Note: The name of the palette should be unique, If we try to use a duplicate name we cannot create the palette and there will be a message on the screen as the Color group already exists.
When the group is created we will get a message as “New color group created successfully”.
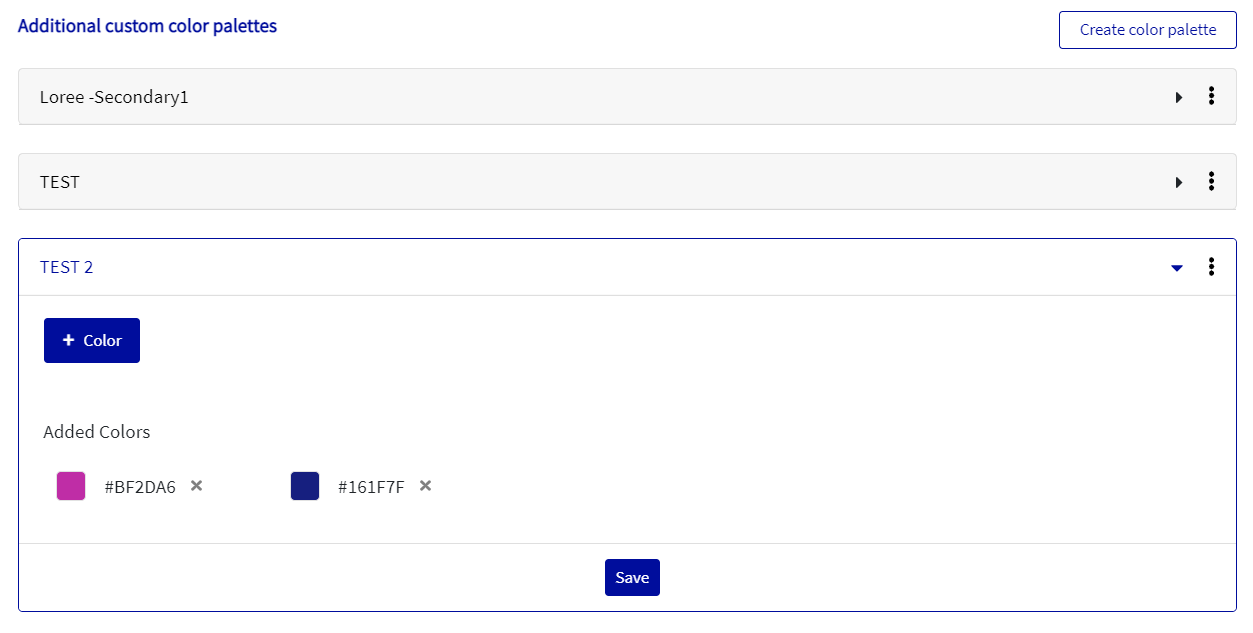
Once the group is created we can click on the (+ Color) Icon and we will have the ability to either choose a color from a color scaling tool, input a specific Hex code for the color, or input a specific RGBA code of the color to be applied. We can choose options of Hex code and RGBA code from the dropdown. After the colors, we can click on save to save the selected colors in the group.
After saving the desired colors for the group palette admin will now be able to edit, share and delete the color palette by clicking on the three dots on the right side of the palette.
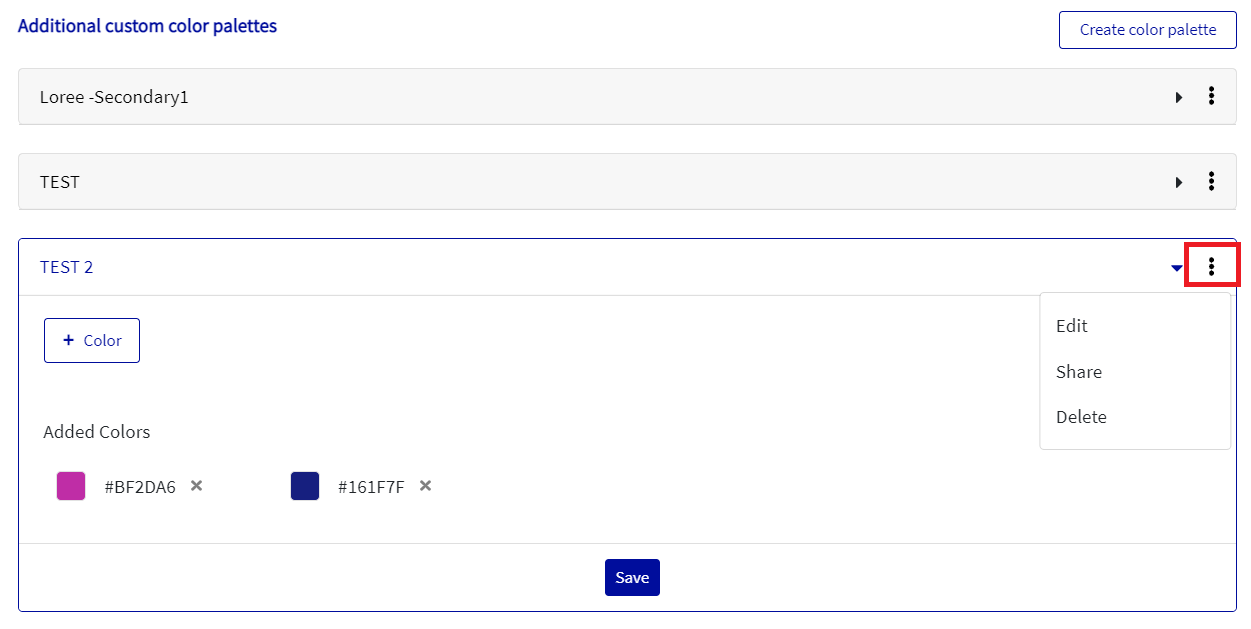
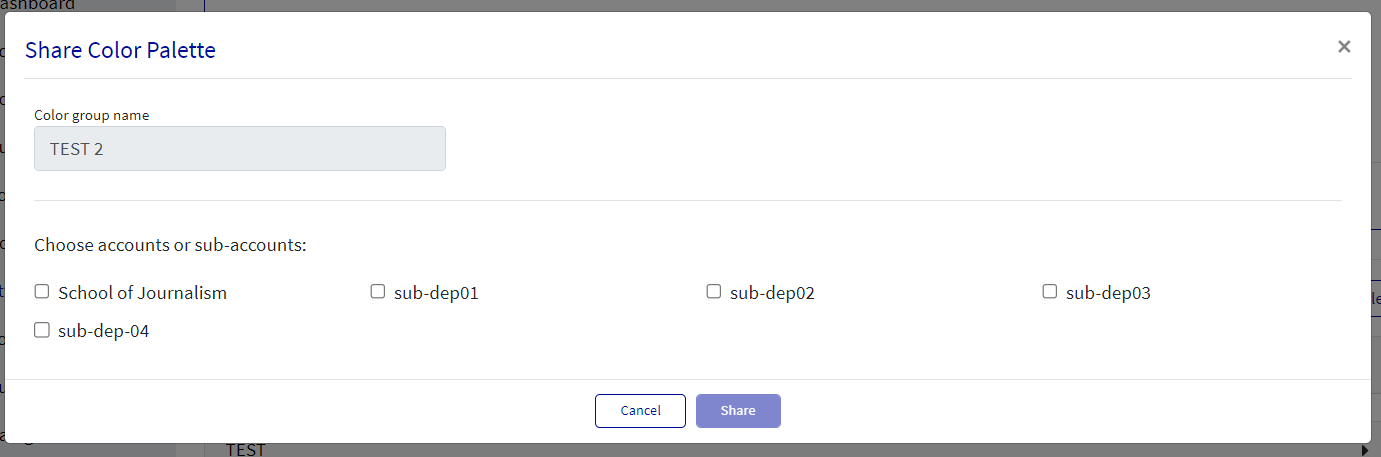
Admin can Edit the name of the color group by clicking on the edit option. Admin can delete the color group by clicking on the delete option. Admin will be able to share the color group with the desired sub-accounts by clicking on the Share option. When a group is shared with a particular sub-account, the selected color in the palette will reflect only in the courses in that particular sub-account.
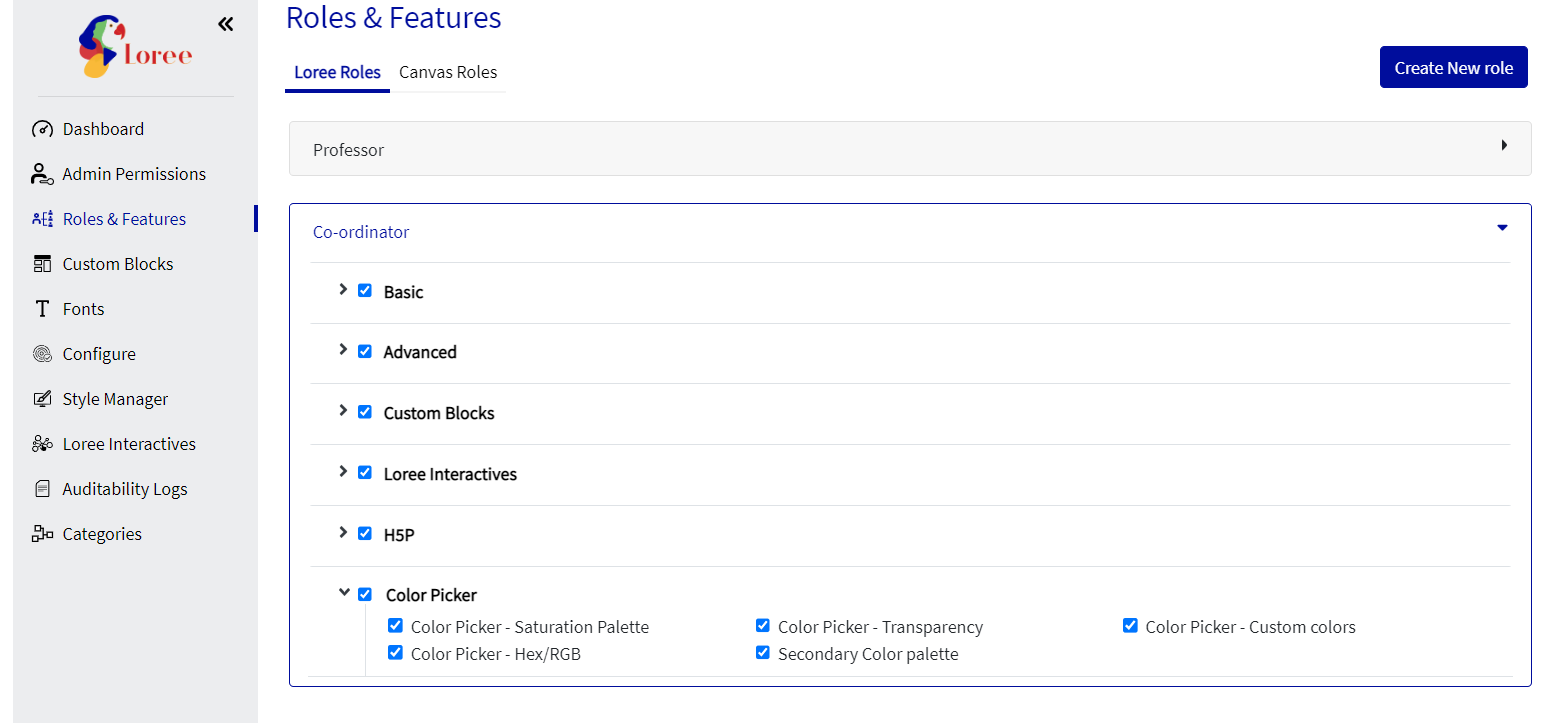
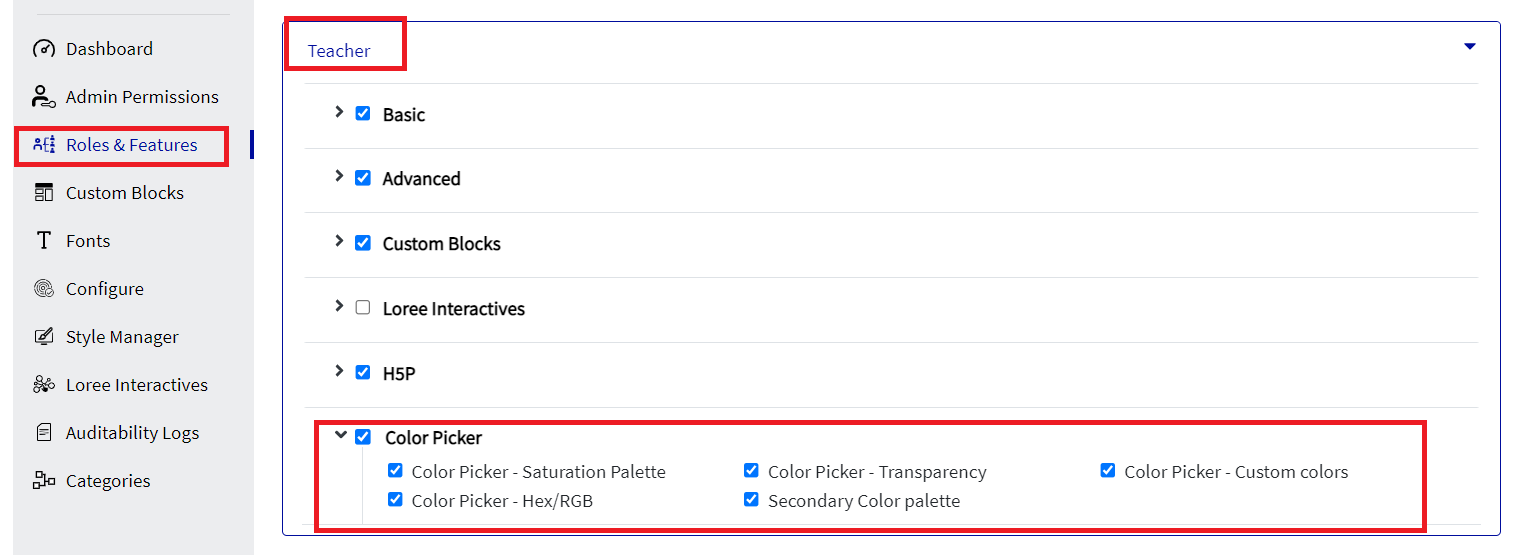
Color Picker Option in Roles and Features.
Now the Loree Admin will be able to manage the Color picker options from the admin dashboard → Roles and features → Color Picker.
This means, even if the admin shared the custom color groups globally or with a specific sub-account, they can manage the availability of the custom colors based on user roles.
Ex: Admin can restrict the teachers to use Global colors and shared color groups.
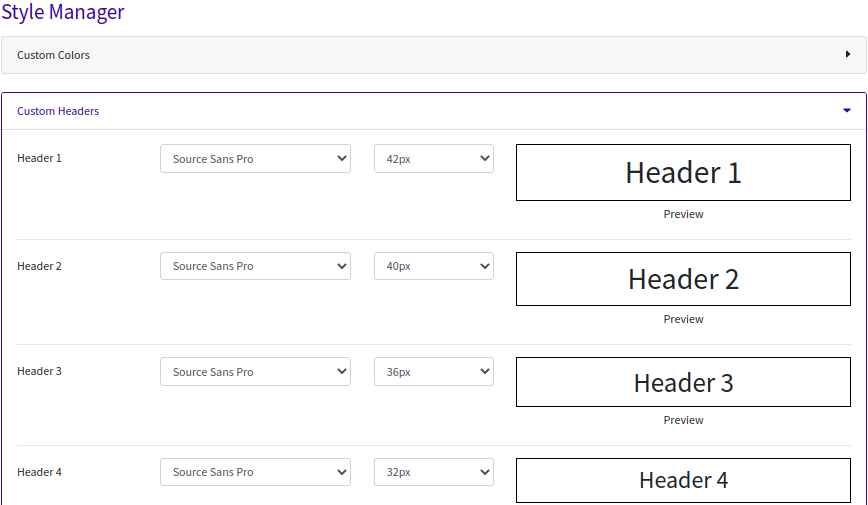
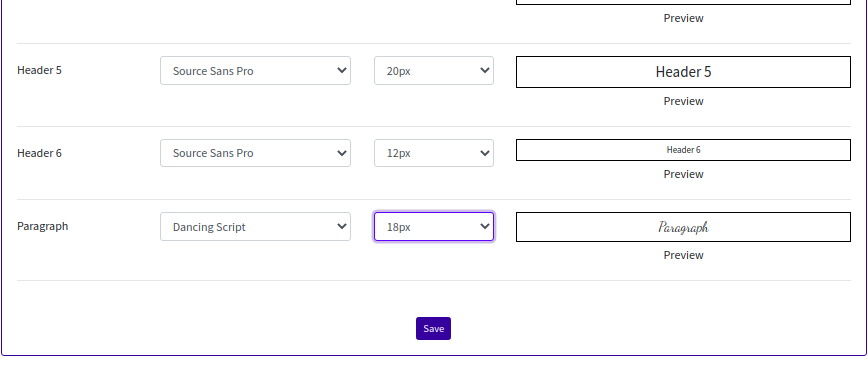
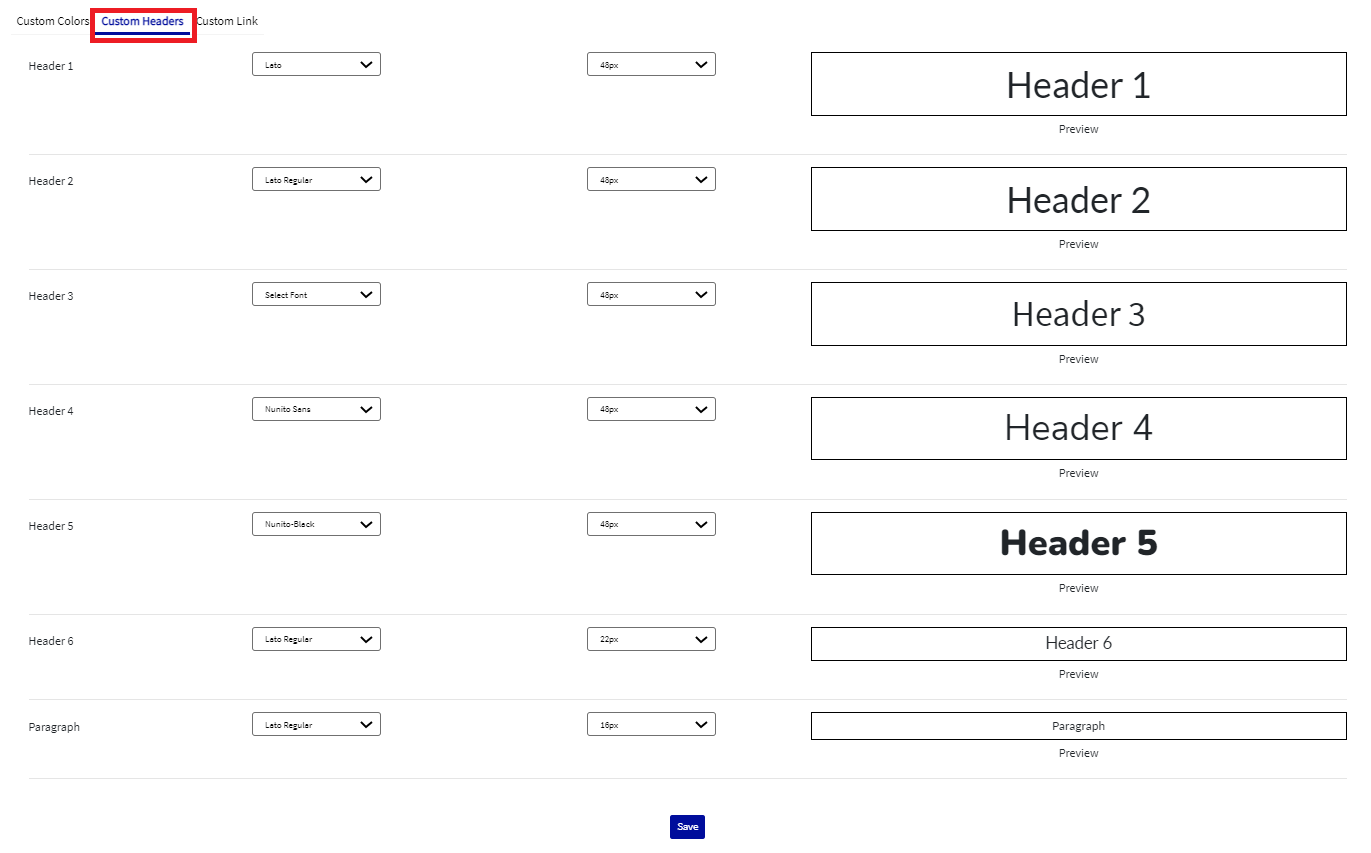
Custom Headers
In Custom Headers, the admin can set 6 headers and paragraph’s Font style and Font size and should Save them. When a Paragraph is used or any of the Headers are used the Font style and size set up in the Loree Admin dashboard will be reflected.
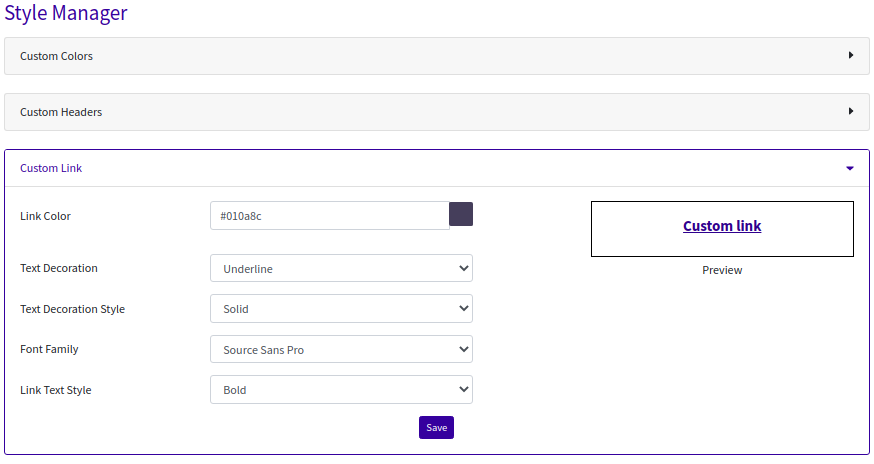
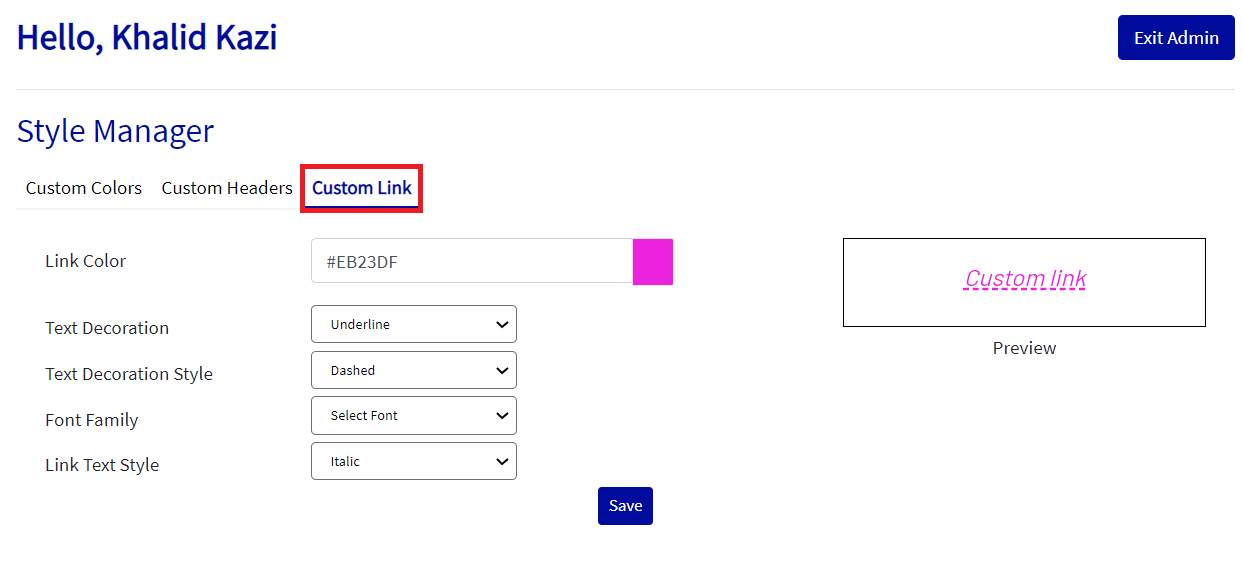
Custom Links
The Links can have colors and font styles like size and font family in Loree. When a Custom Links like its their font family, size, link decoration, and link - style can be set in the Custom Links option in the Loree Admin dashboard to reflect in the Loree editor.
Note: All links like the external links or quick links for the whole organization will have the same link style applied in the Custom links in the Loree Admin dashboard.
Loree Interactive Management
Using this option Loree admin can manage interactives for all the users. Admin can edit the name of an interactive using the edit option or delete any unwanted interactives from the list. using the delete option. Admin can also share any interactives to Private, Global, and Shared folders using the share option.

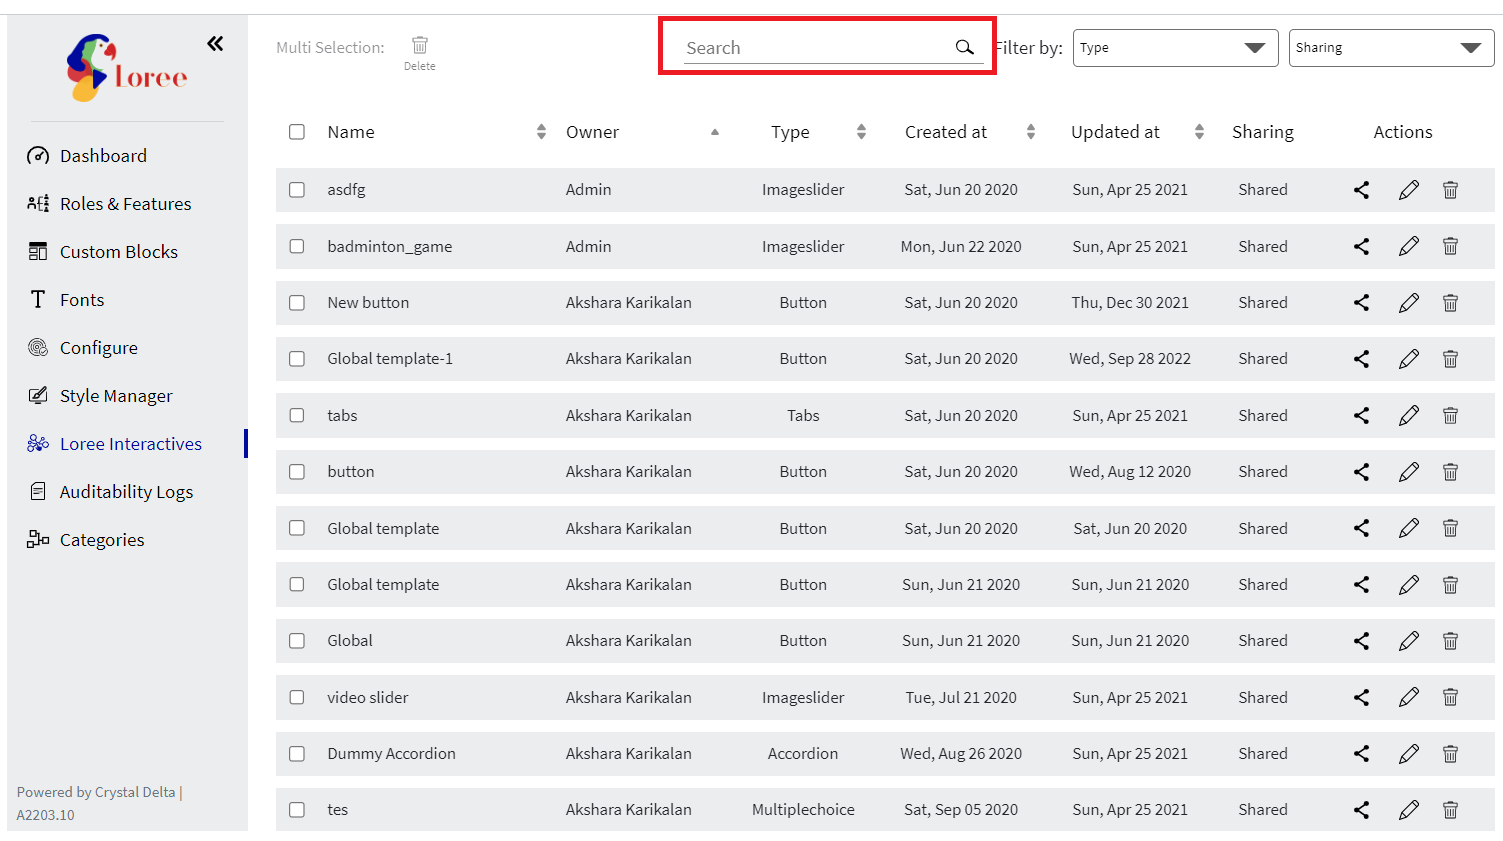
We have provided multiple options to search and filter between interactives.
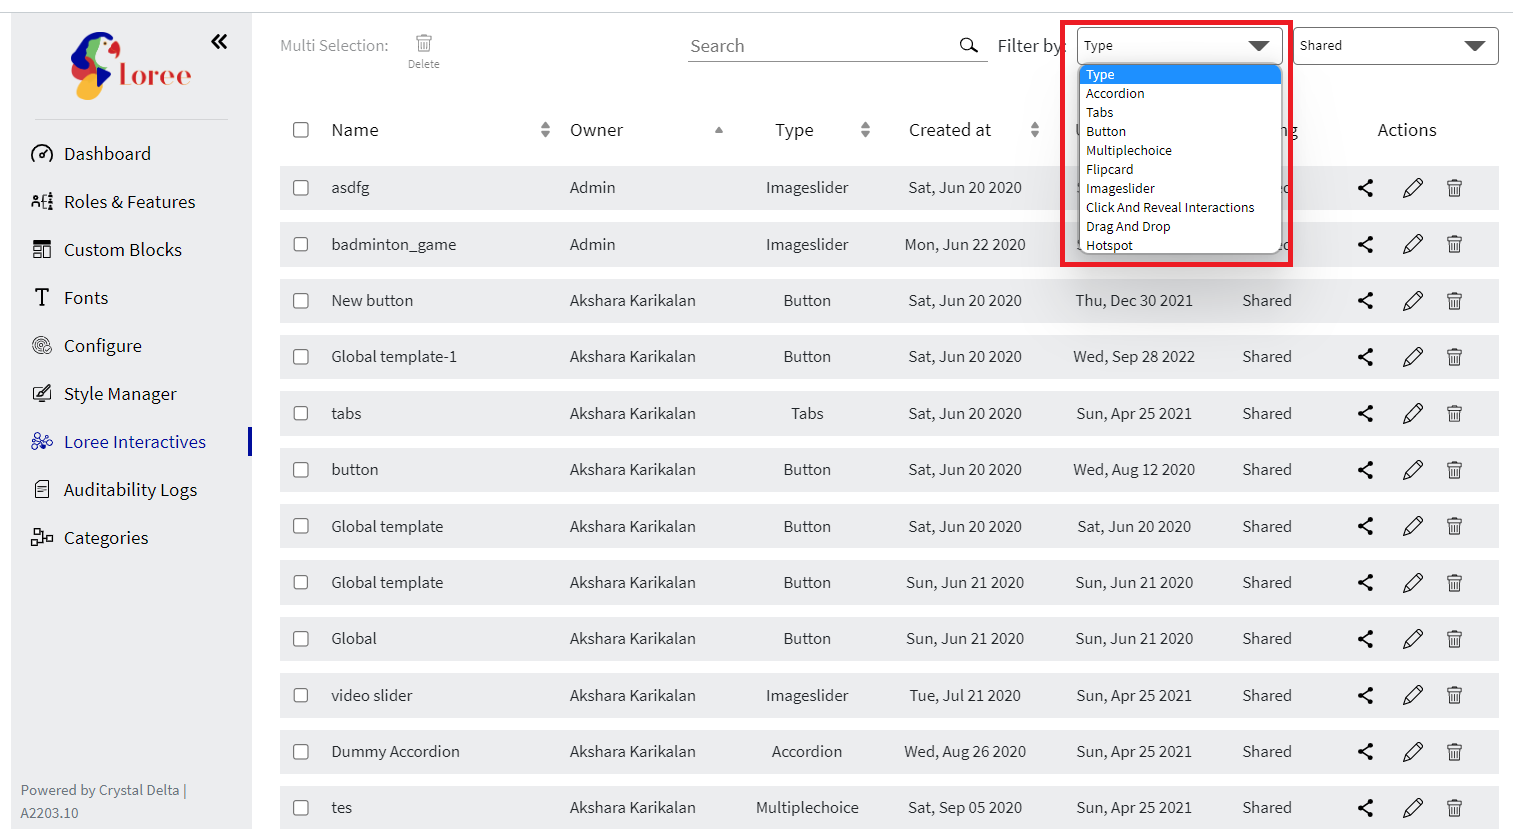

We can always search for any interactives by their name.
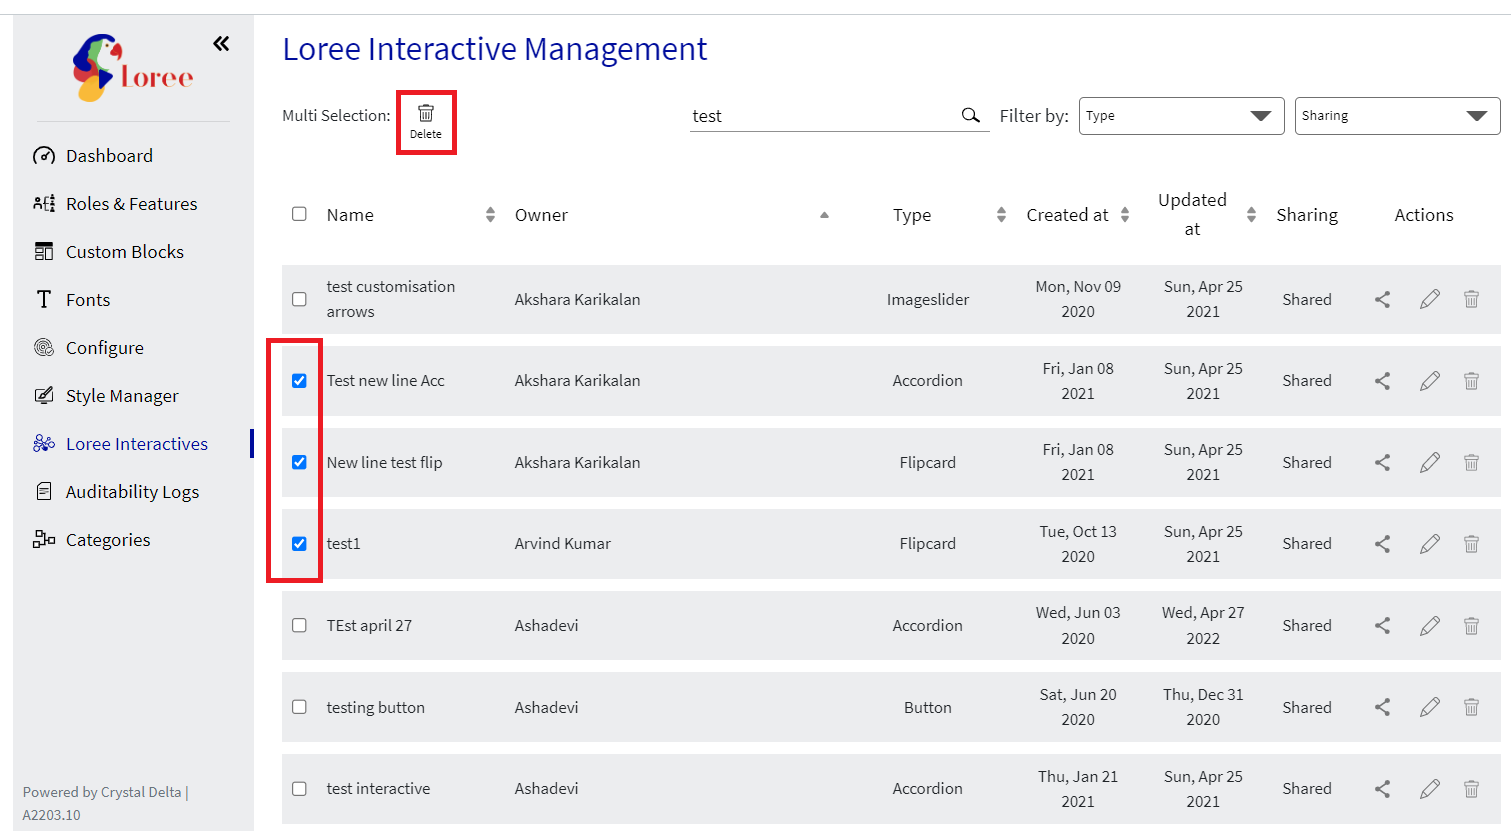
If we want to delete multiple interactives we can select multiple interactives by clicking on the check box and then clicking on the delete option on the top.
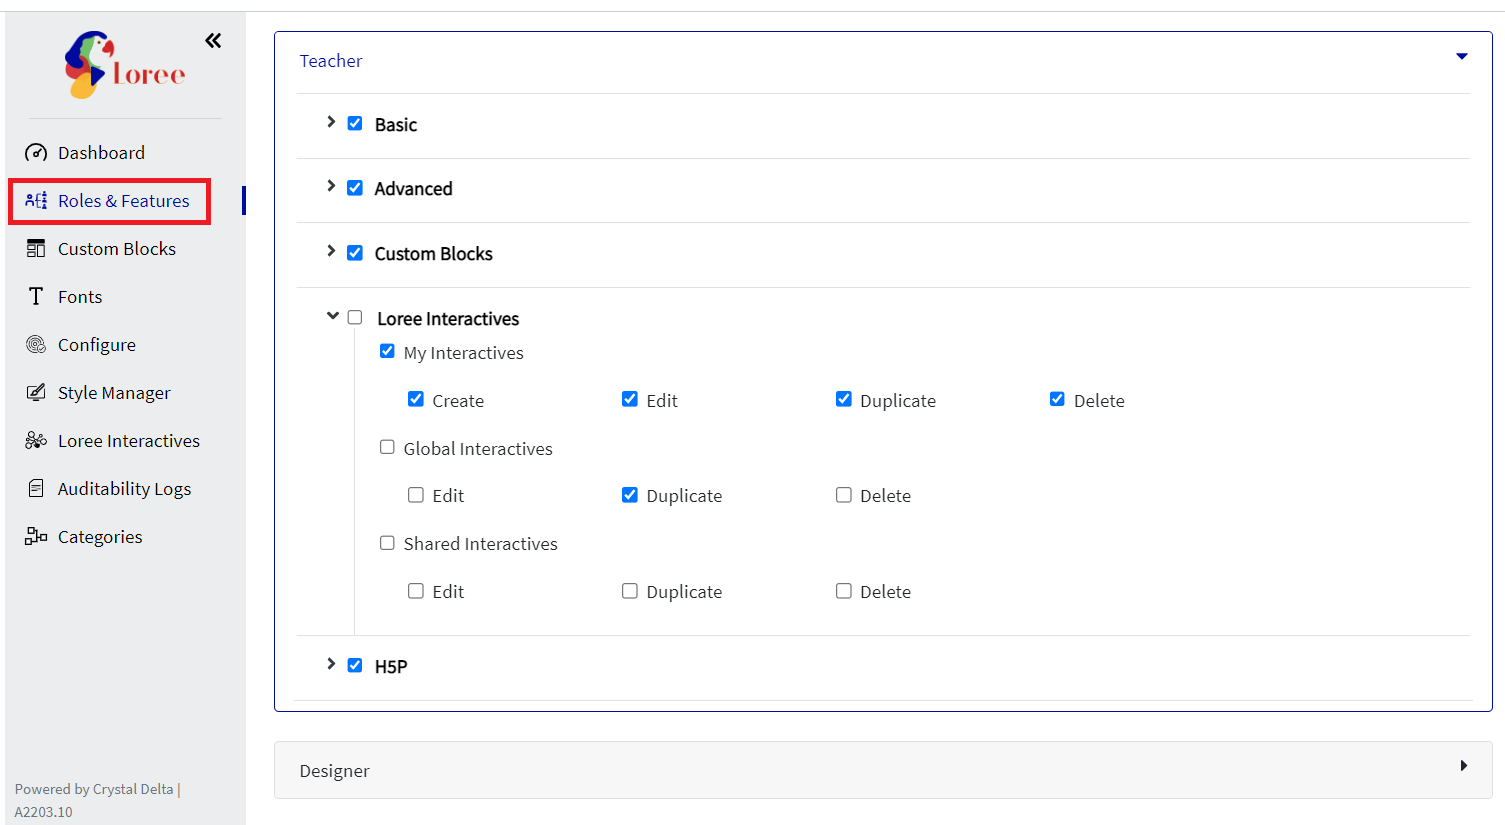
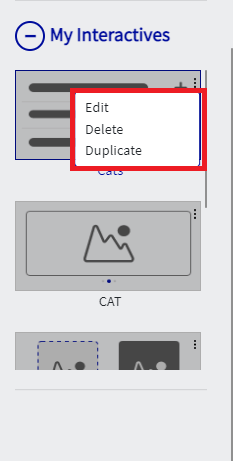
Using roles and features admin can give permissions for creating, Editing, Duplicating, or Deleting a Loree Interactive based on the Loree Roles.
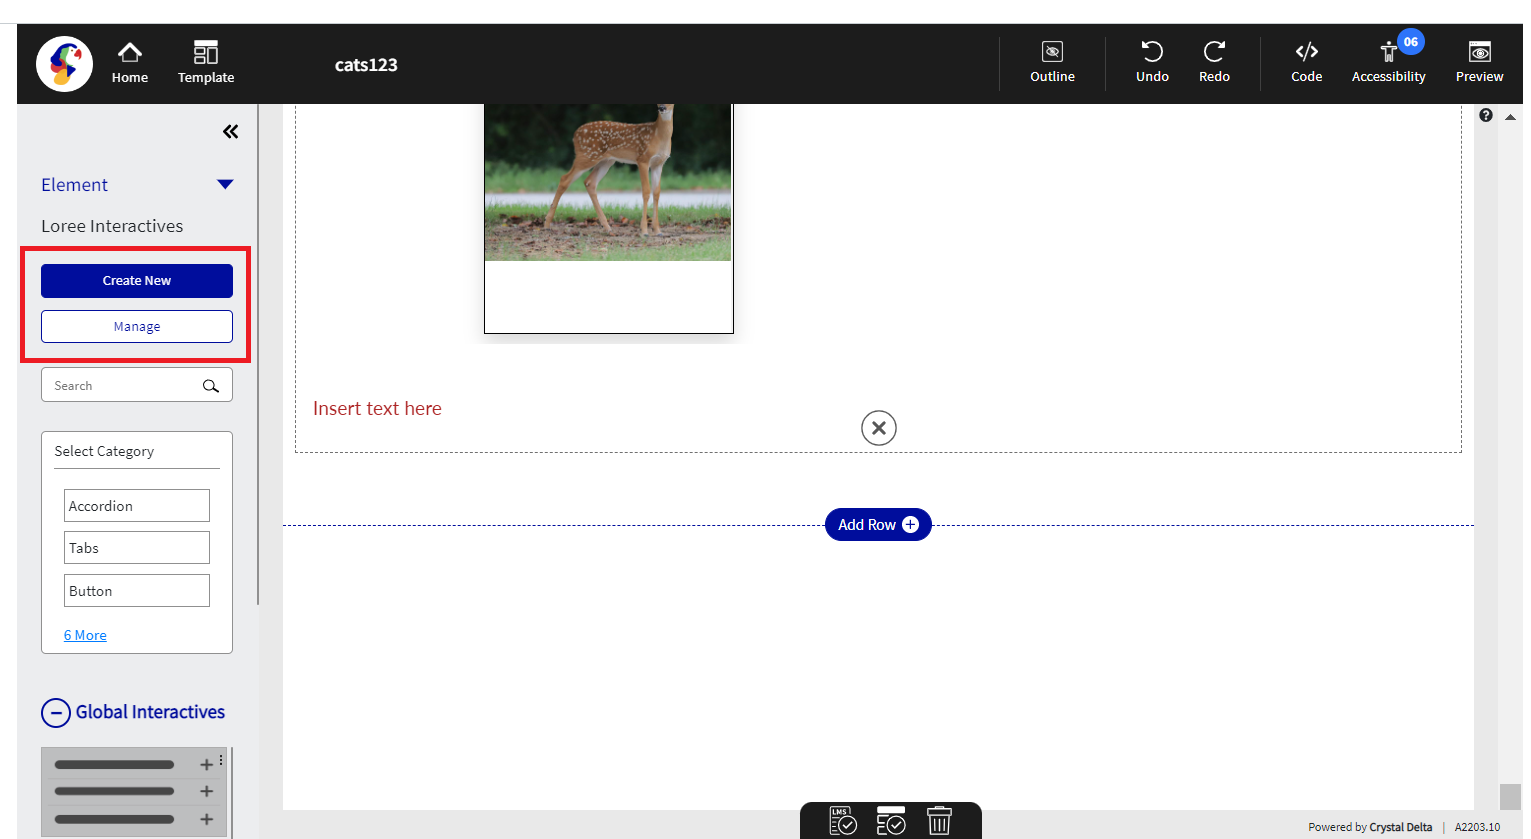
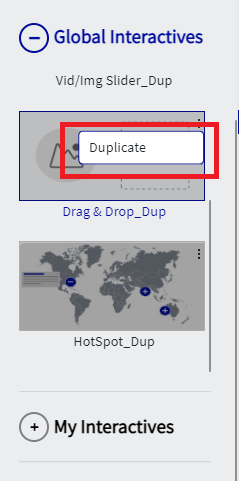
In the Loree Editor when we click on the Loree interactives option we get an option to Create New or manage existing Loree interactives, Where the user can manage My interactives or Global interactives based on the permission provided by the admin for the role of that user.
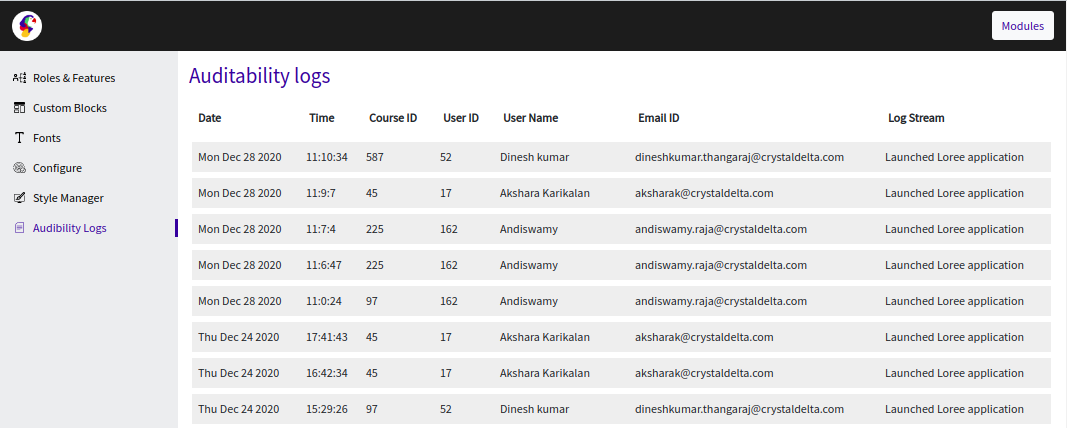
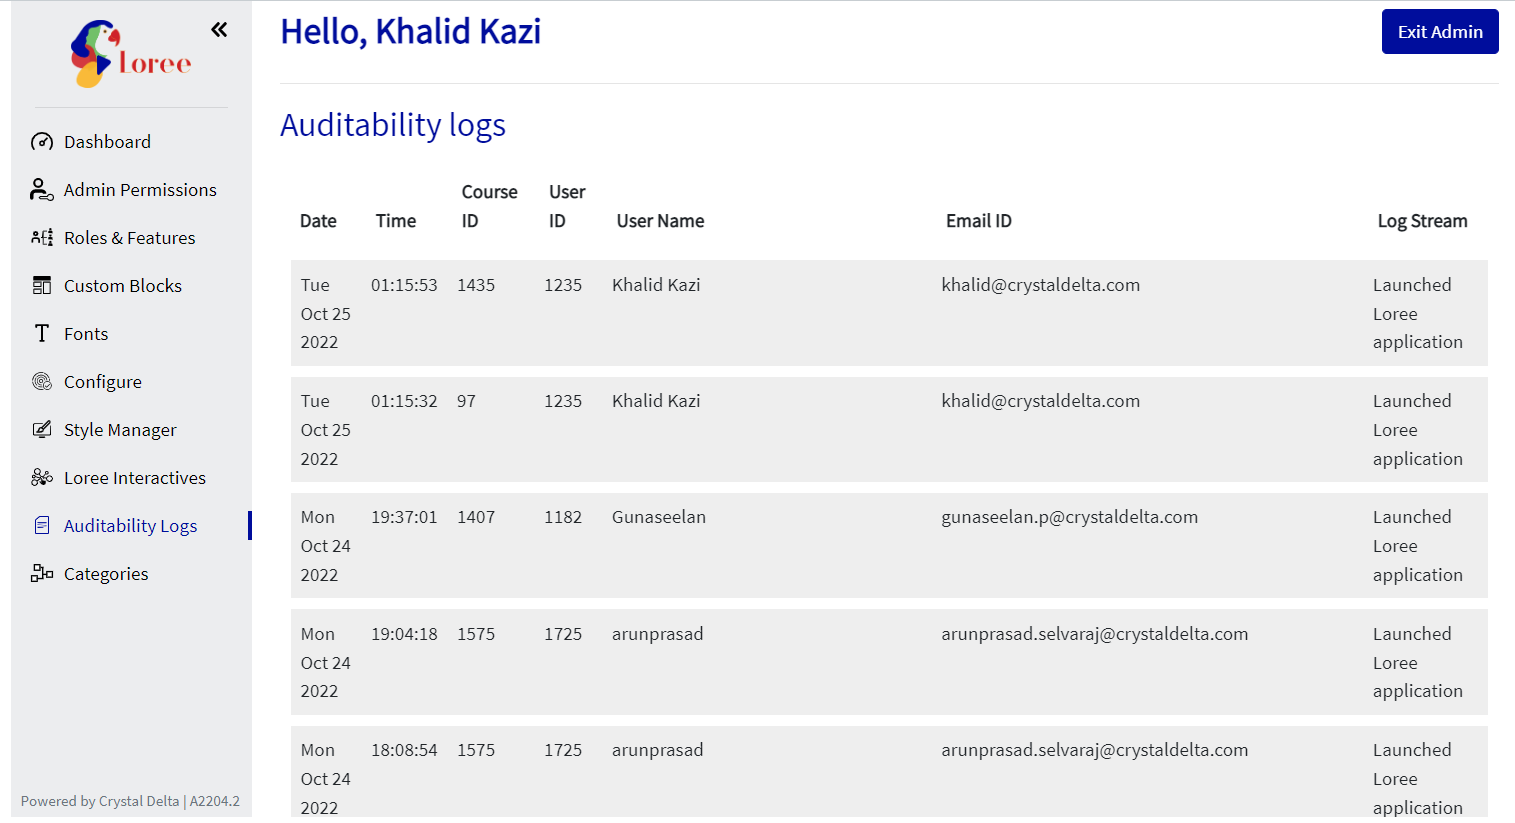
Auditability Logs
Auditability Logs in the Admin dashboard would give the information about who is using or launching Loree editor in the Canvas instance.
Categories
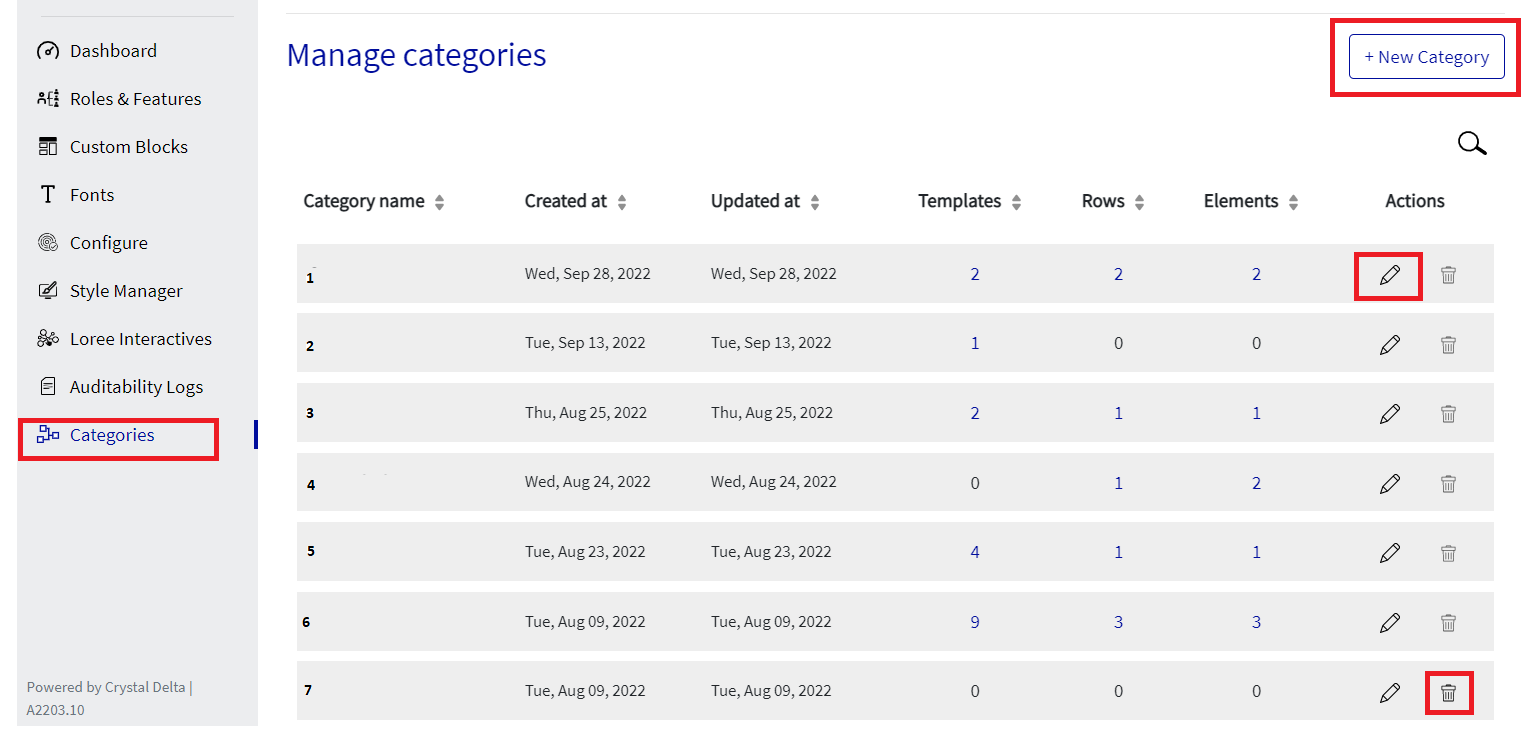
Using this option Loree admin can manage Categories for all the users. Admin can edit the name of a Category using the edit option or delete any unwanted Categories from the list. To delete any category from the list admin has to make sure that there are no Templates, Rows, or Elements in that category if there are any Templates, Rows, or Elements in a category then the delete button will be disabled. Admin can also add a new category to the list by clicking on the [+ New Category] option. Users will only see the Categories in the list that are updated by the Admin.
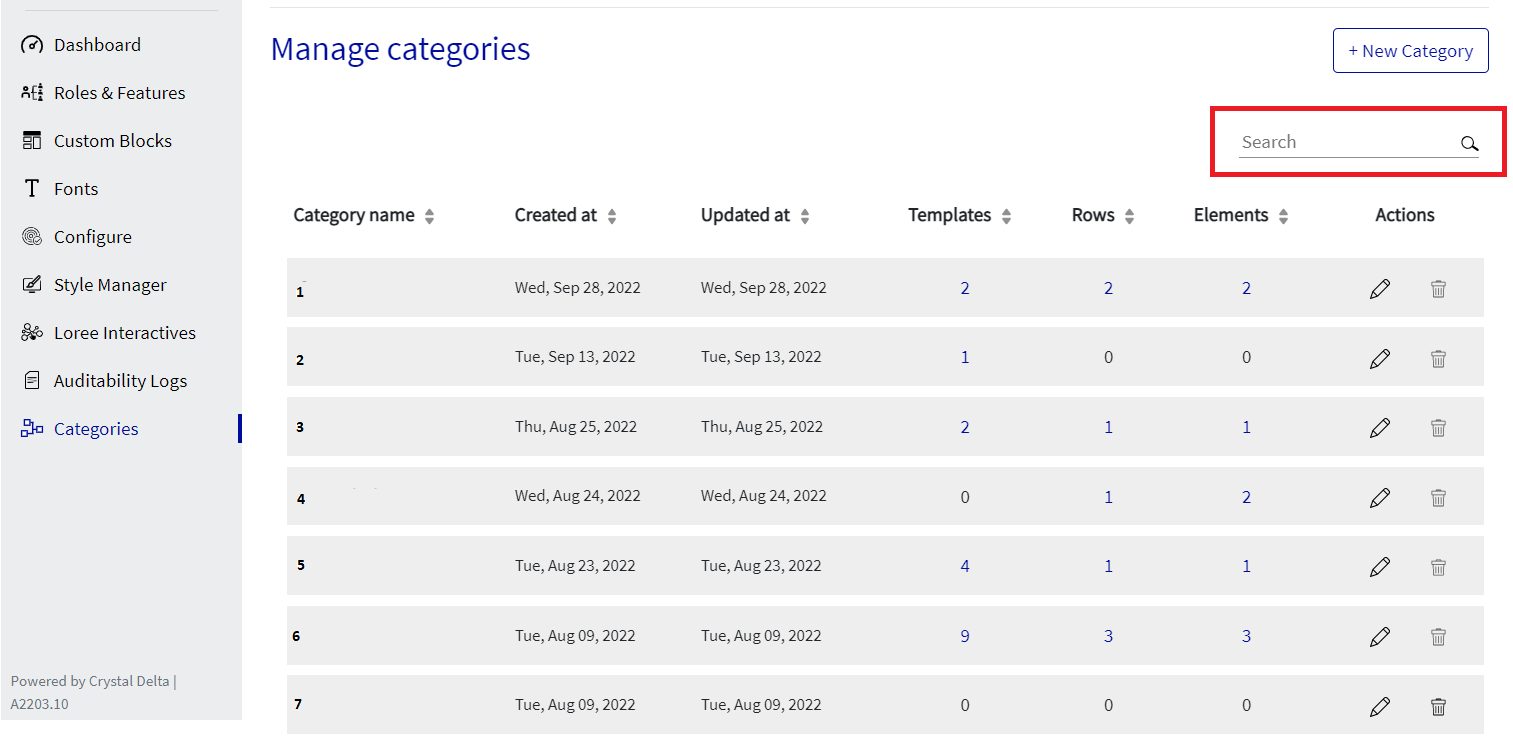
Admin can always search the categories by their names.
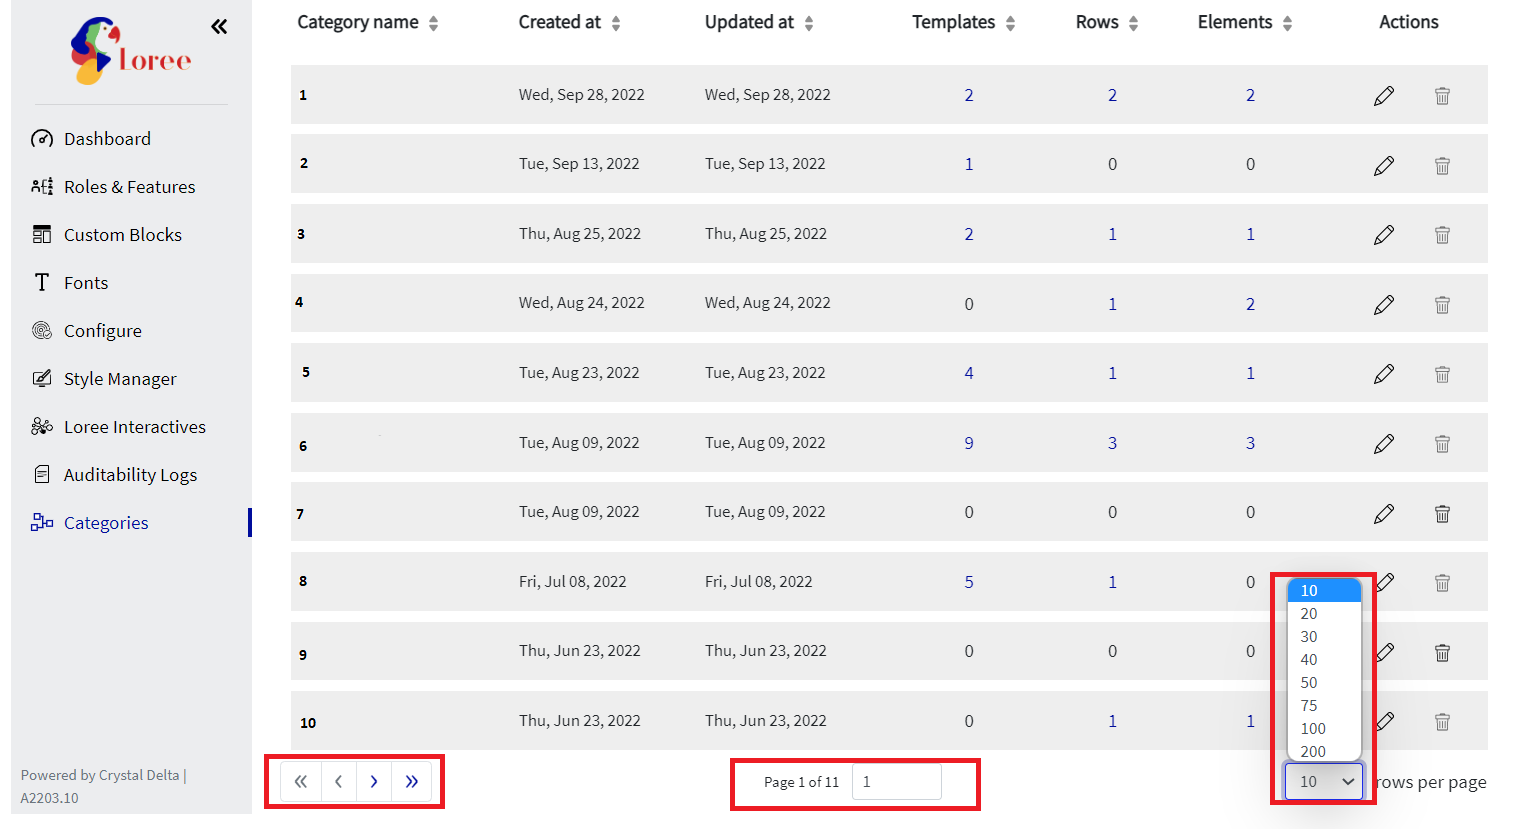
We have also provided a pagination option at the bottom of the Category page that makes it easy for the admin to move through pages or select the number of rows to be visible per page.
Thank you!!!